DI Wedding Dress Makeover for Prom
It’s common knowledge for many DI customers that Deseret Industries is the place to go for low-cost wedding dresses. But what about when you want a formal gown, but don’t want to look so bridal?
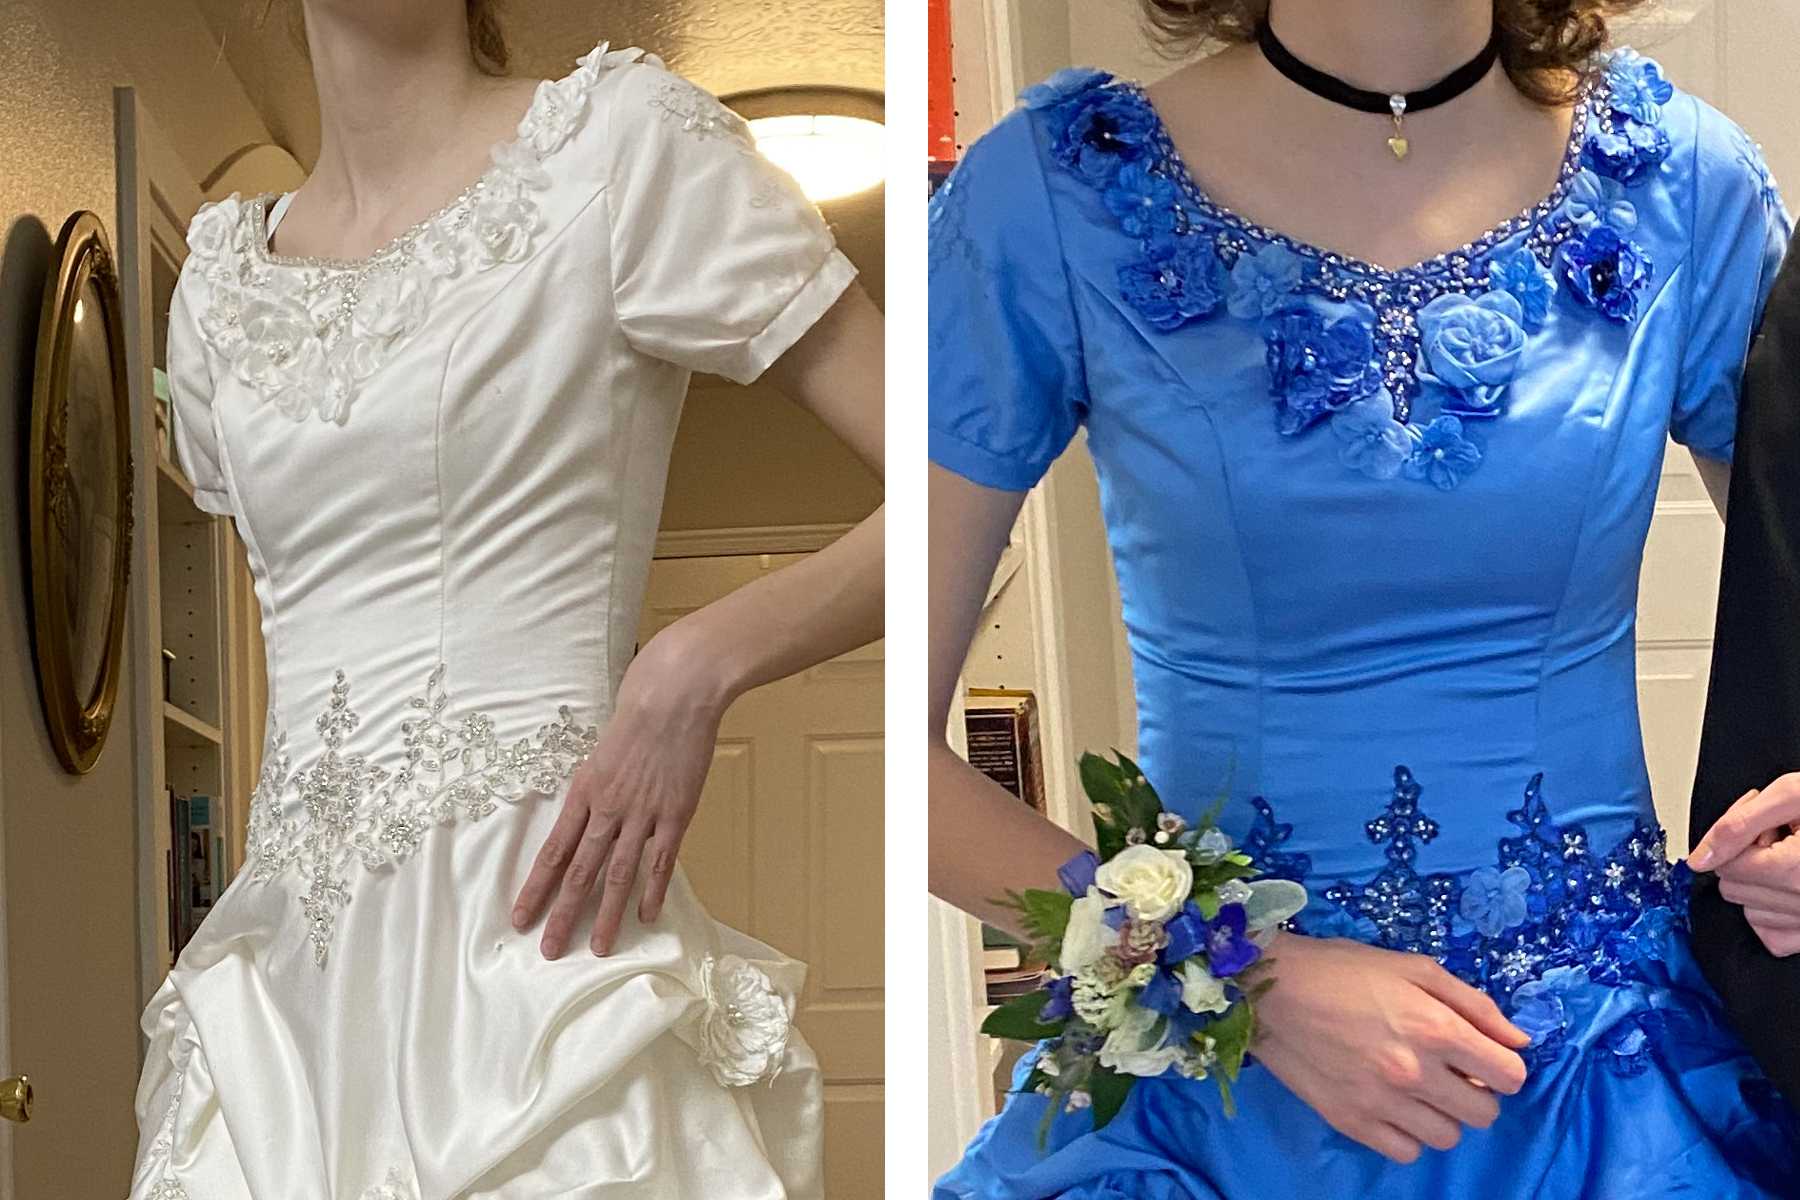
With some dye and a little work, donated wedding dresses at DI can be made over into gorgeous gowns for prom and any other formal occasion.
1. Pick Out the Dress
2. Wash
3. Alterations
4. Dye Testing
5. Dye the Dress
6. Wash and Dry
7. Prep
1. Pick Out the Dress
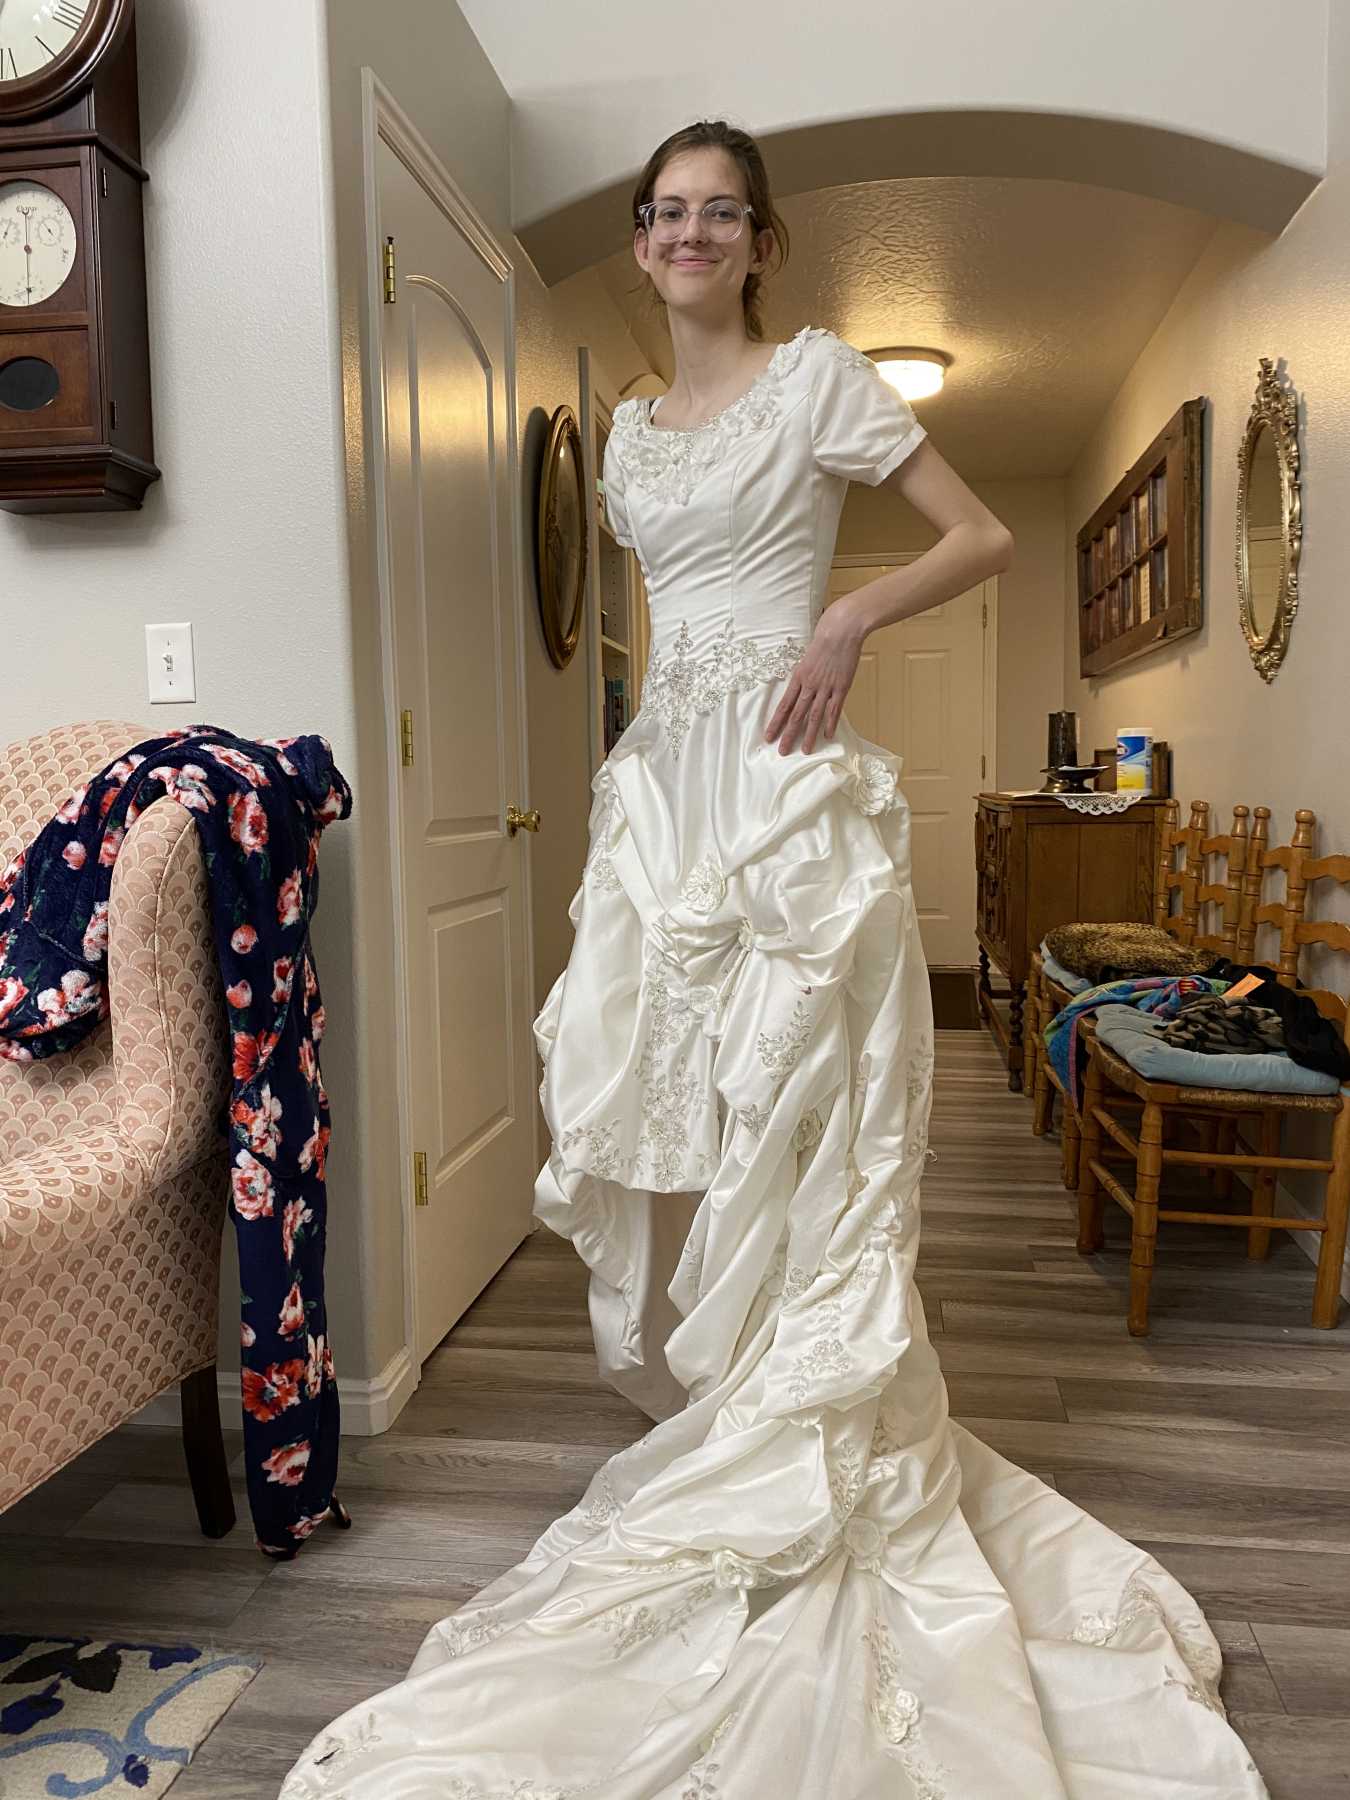
When choosing the dress you want to work with, it’s important to remember that dyeing the dress won’t completely change it. Choose a style that’s flattering and as close to your ideal look as possible (you may be able to alter it a little).
We also recommend checking the tags on the dress to make sure you know what kind of material you’re working with. Most fabric dyes require that you wet the fabric at a high heat, and some materials stand up to this treatment better than others. That being said, there are dyes available for more delicate fabrics (like silk). Knowing what you’re working with is key to getting the color to apply correctly.
You should also look over the dress carefully to see if there are any appliqués, netting, or layers (and ascertain what materials these are made of). Different material types have different levels of tolerance for heat, and they’ll take the dye differently too.
2. Wash
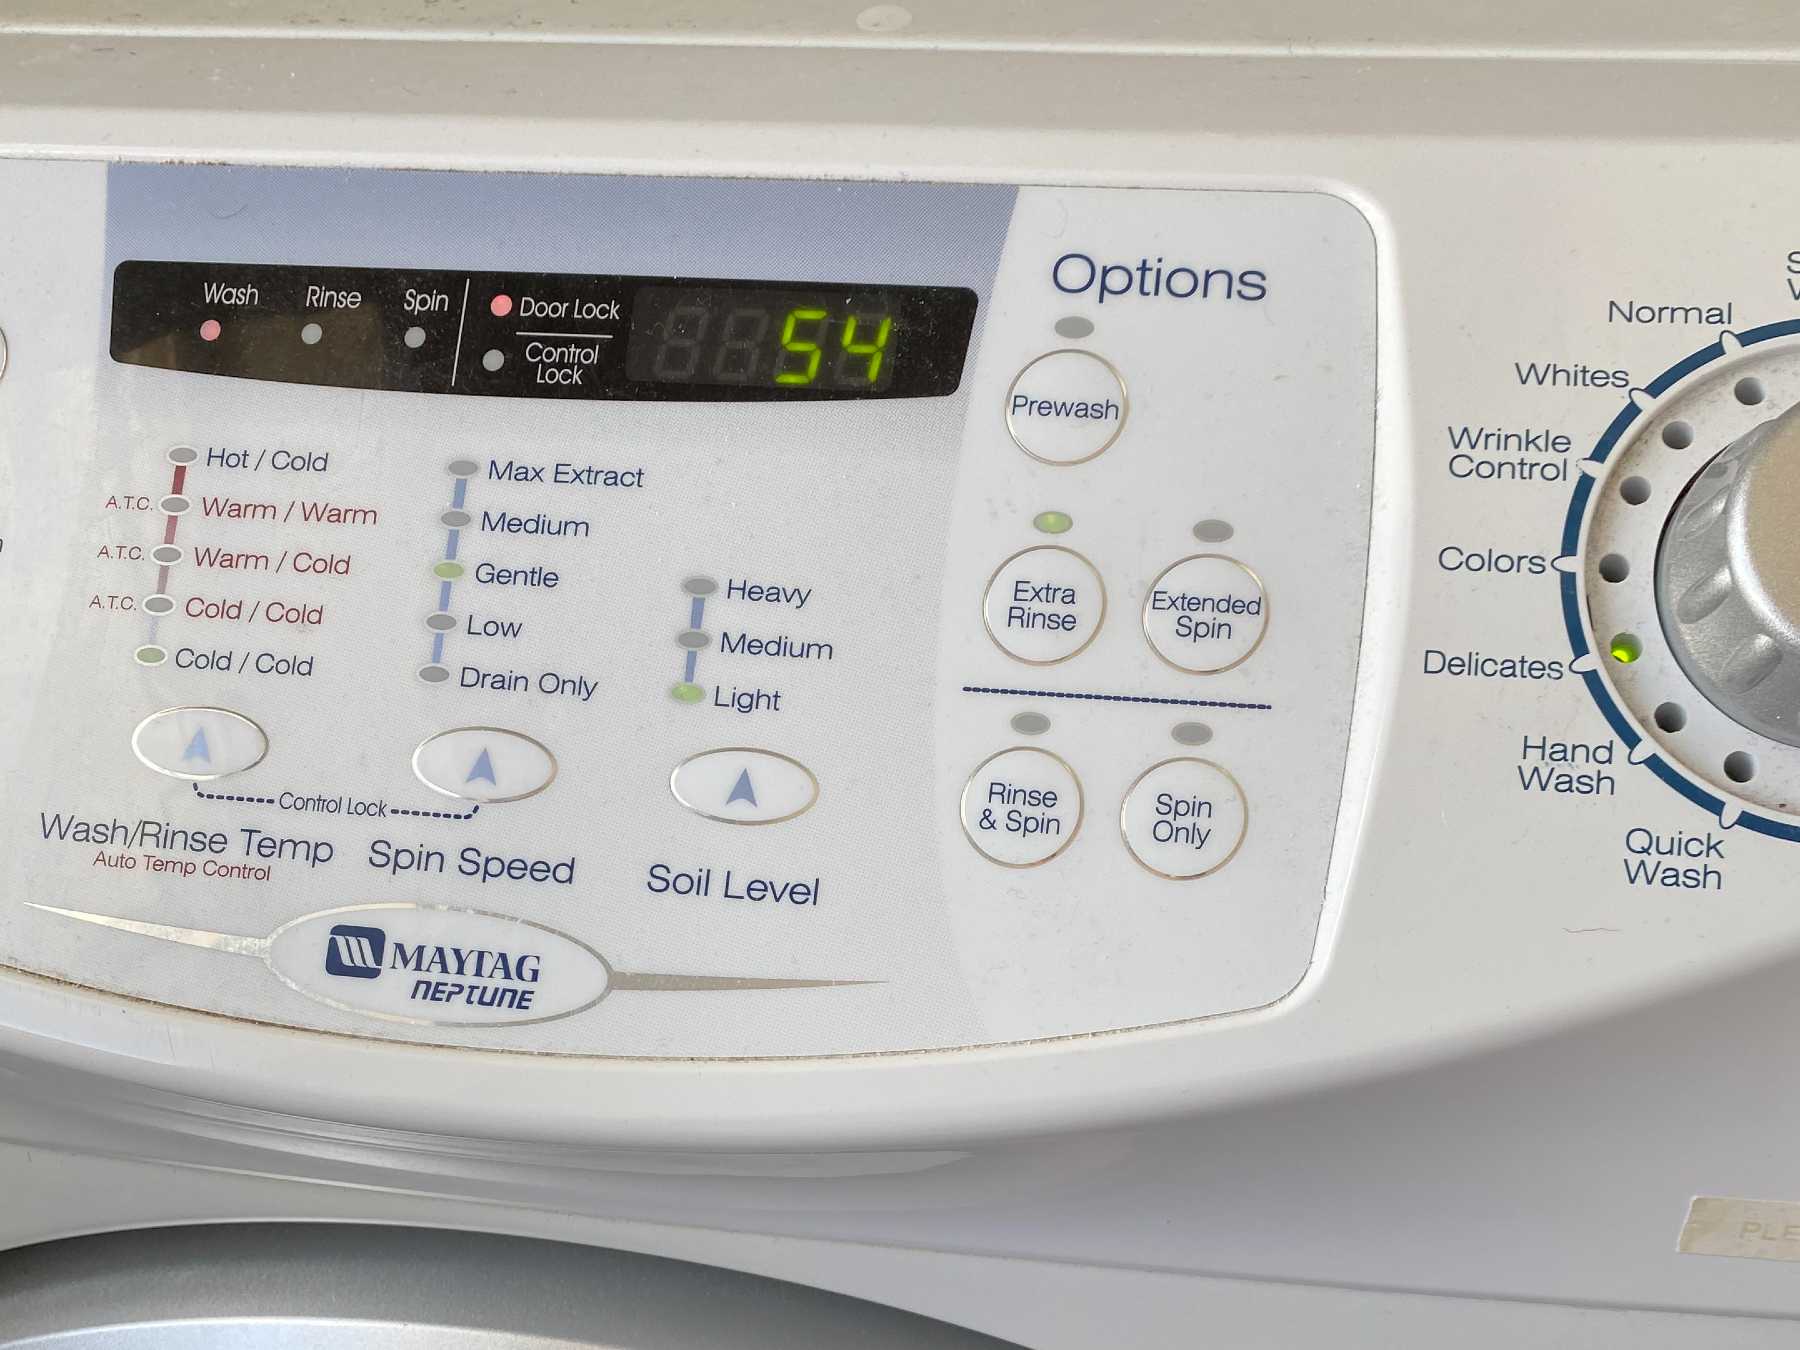
While wedding dresses at DI are typically in good condition, it’s always a good idea to wash your dress before you start working on it too heavily. Since the dress will be soaked in the dye anyway, it won’t hurt to wash it in your washing machine—just check the tag to ensure the heat isn’t too high. Once clean, just air dry the dress.
3. Alterations
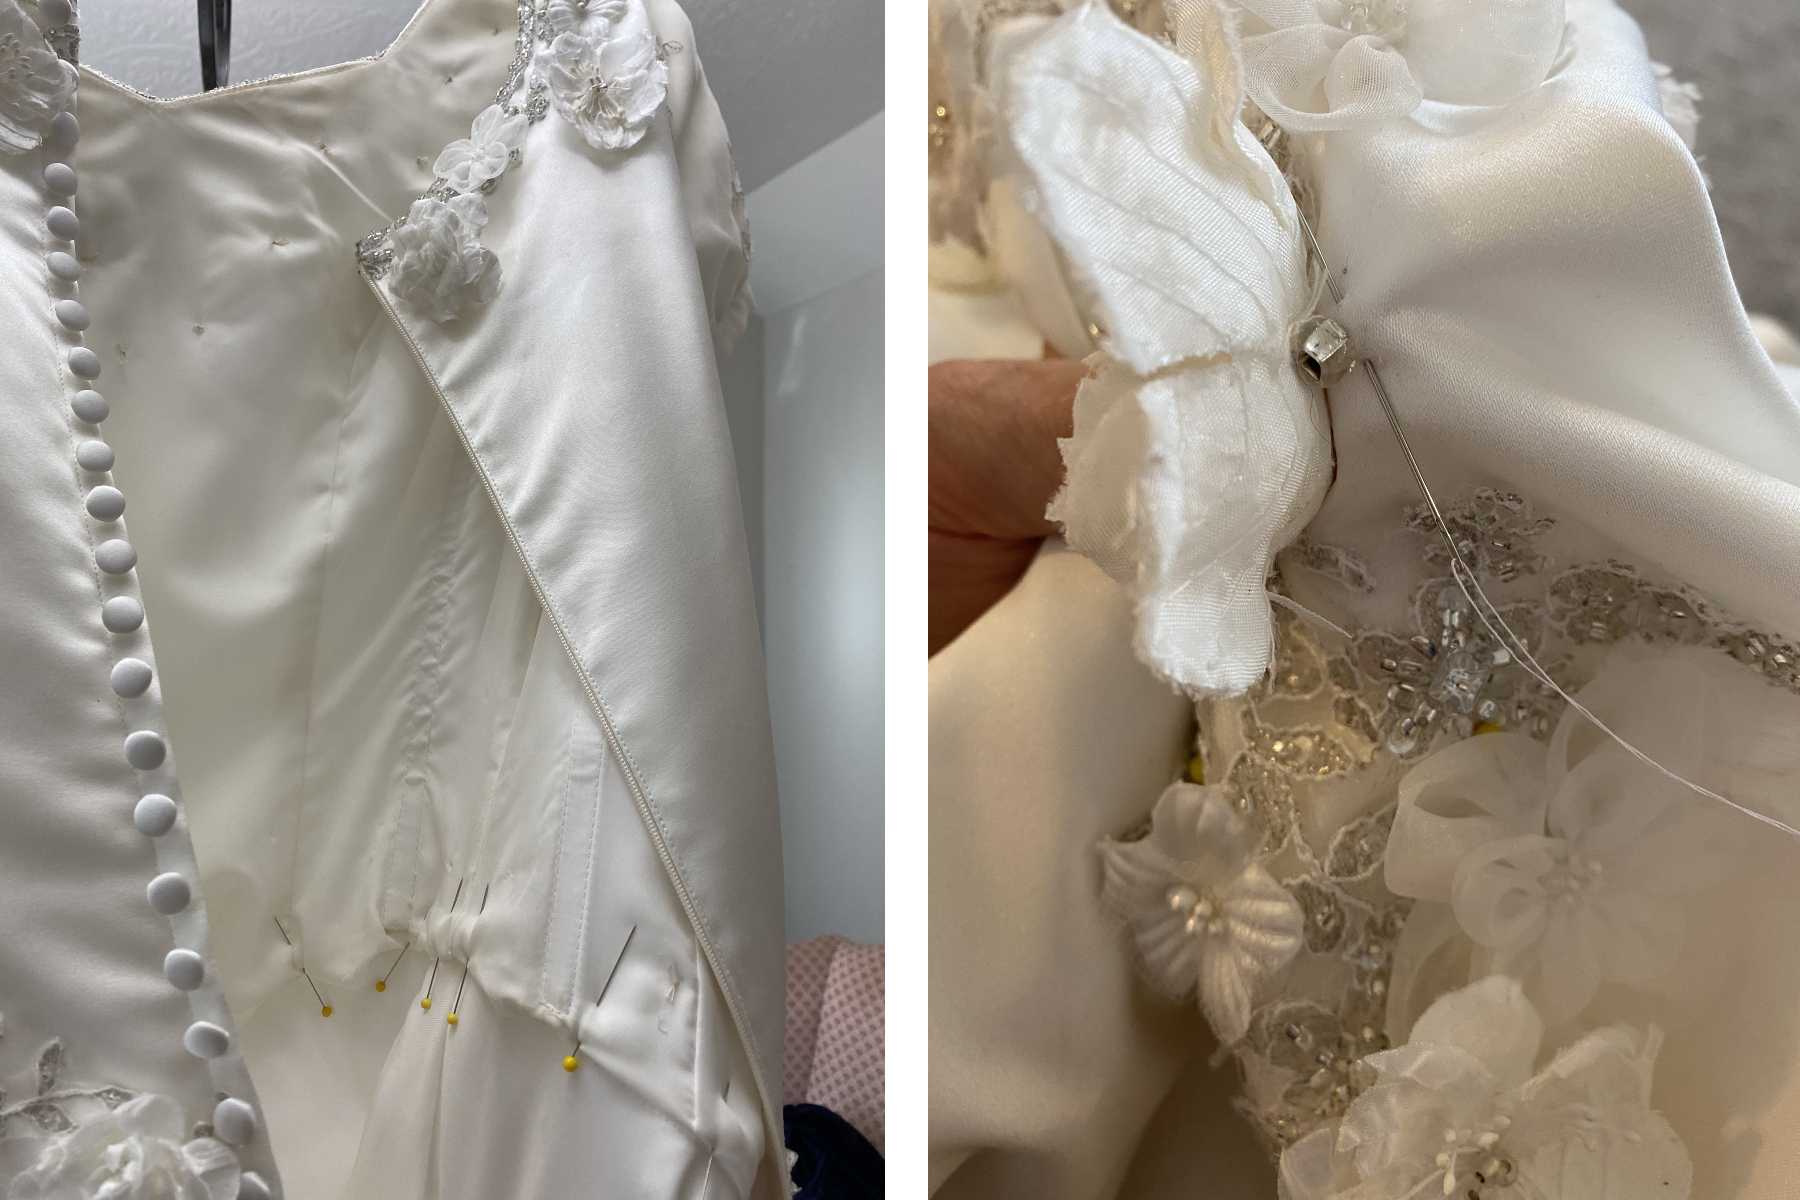
If there are any alterations you want to make to the dress, we recommend you do that before dyeing. Our dress had an underskirt that we decided we wanted to remove. We also reinforced some of the embellishments on the dress that seemed to come loose after washing.
If you remove any fabric from the dress, don’t throw it away. Instead, hang onto it so you can test the dye and make sure the color will “take” the way you want. You can also use extra fabric to make coordinating ties, boutonnieres, and other accessories.
4. Dye Testing
Before you take the leap of dyeing your dress, we highly recommend you test the dye first to ensure it’s going to work the way you want. Depending on your dress and the look you’re going for, you may need to soak the dress for less time than is recommended on your dye instructions. Or you may need to soak your fabric twice to get the desired result.
If you saved any excess fabric from your alterations, try using that for your dye test. If not, choose a small section from your dress—preferably in an area that isn’t as visible as the rest.
5. Dye the Dress
Now for the moment you’ve been waiting for! It’s time to dye your dress.
As previously mentioned, there are different types of dyes for different types of fabric. It’s important to follow the instructions on your specific dye, but generally speaking, most dyes require you to keep your water at a specific temperature.
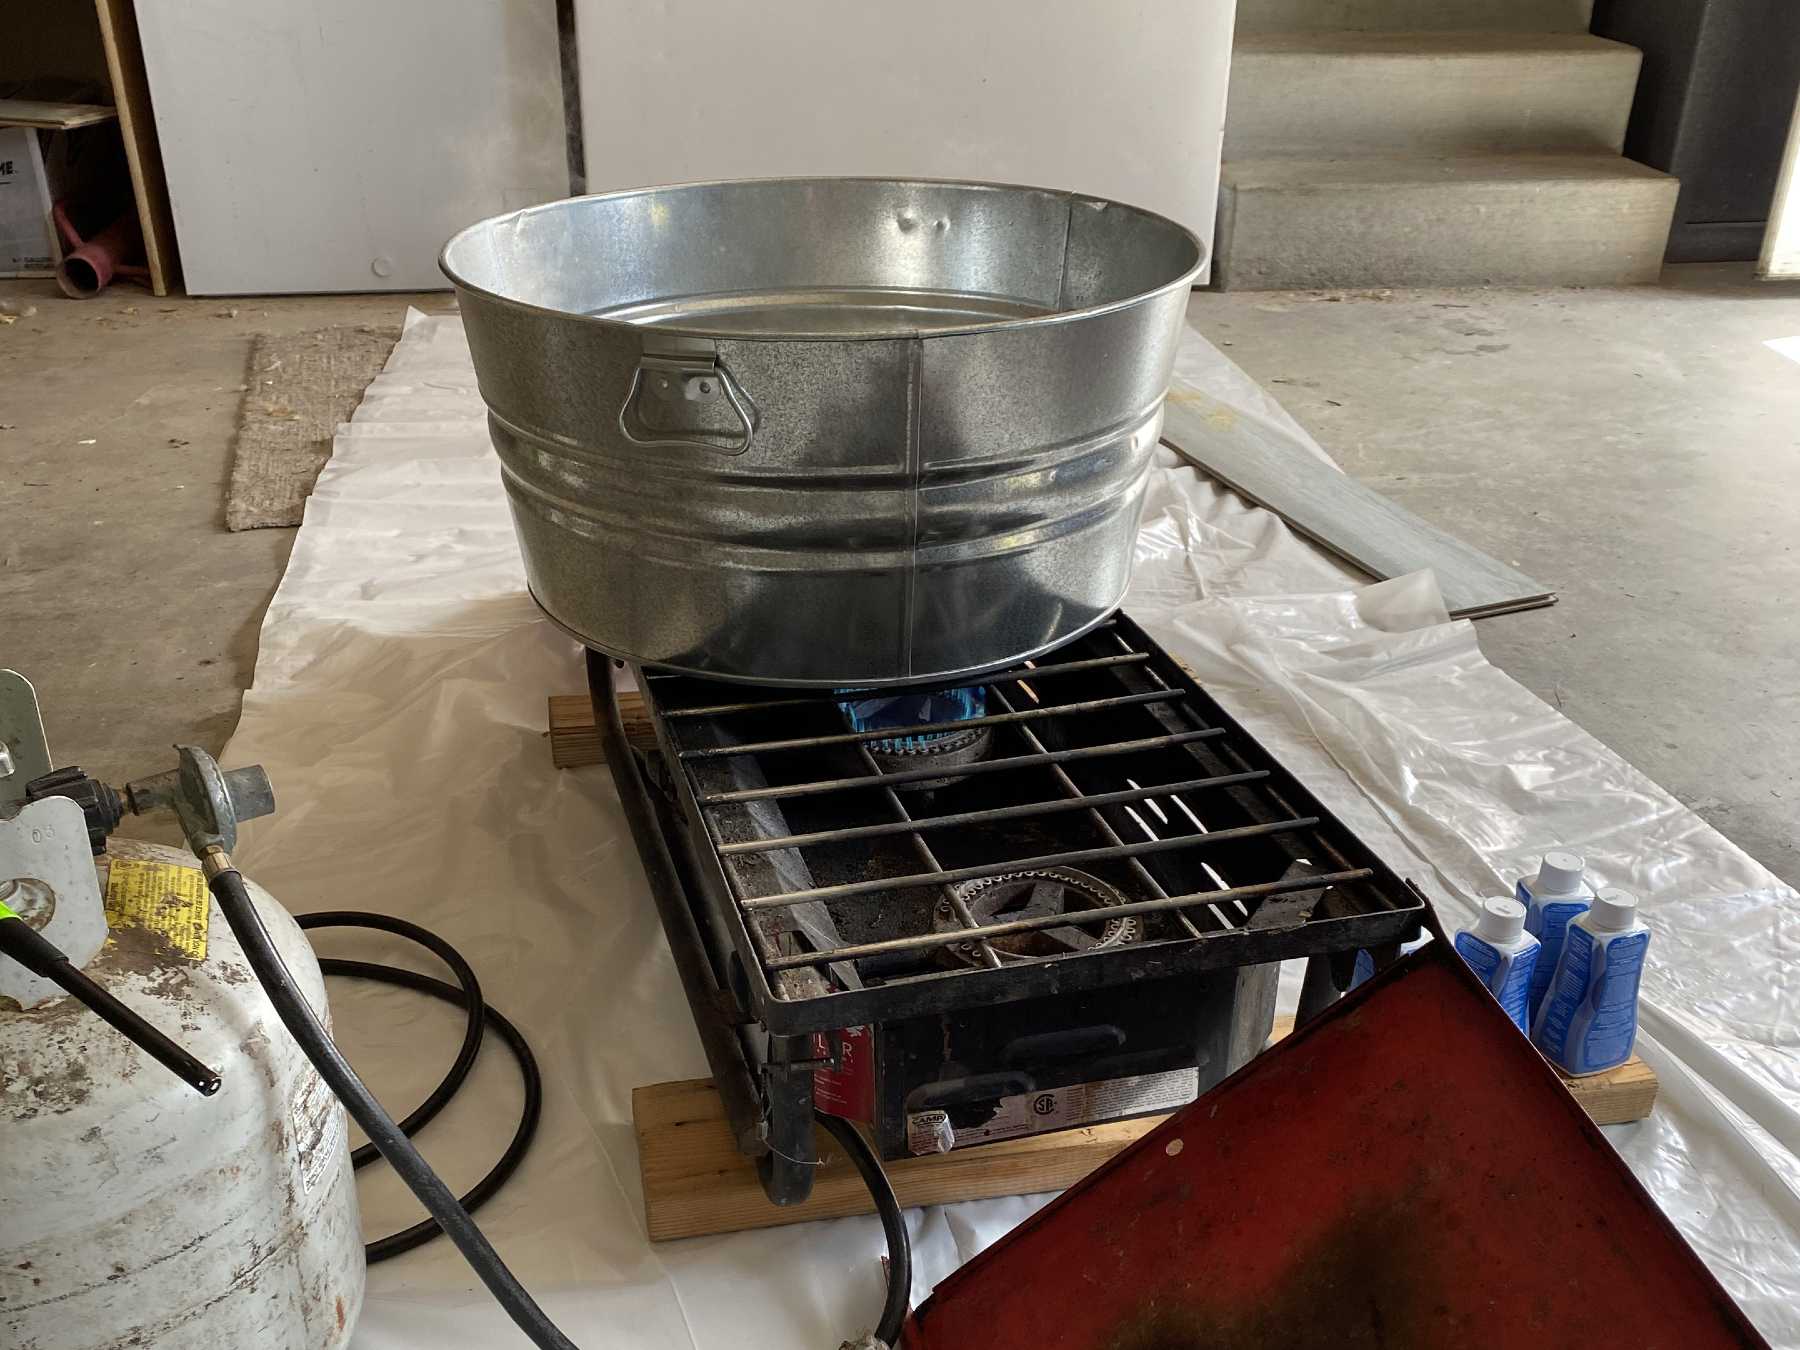
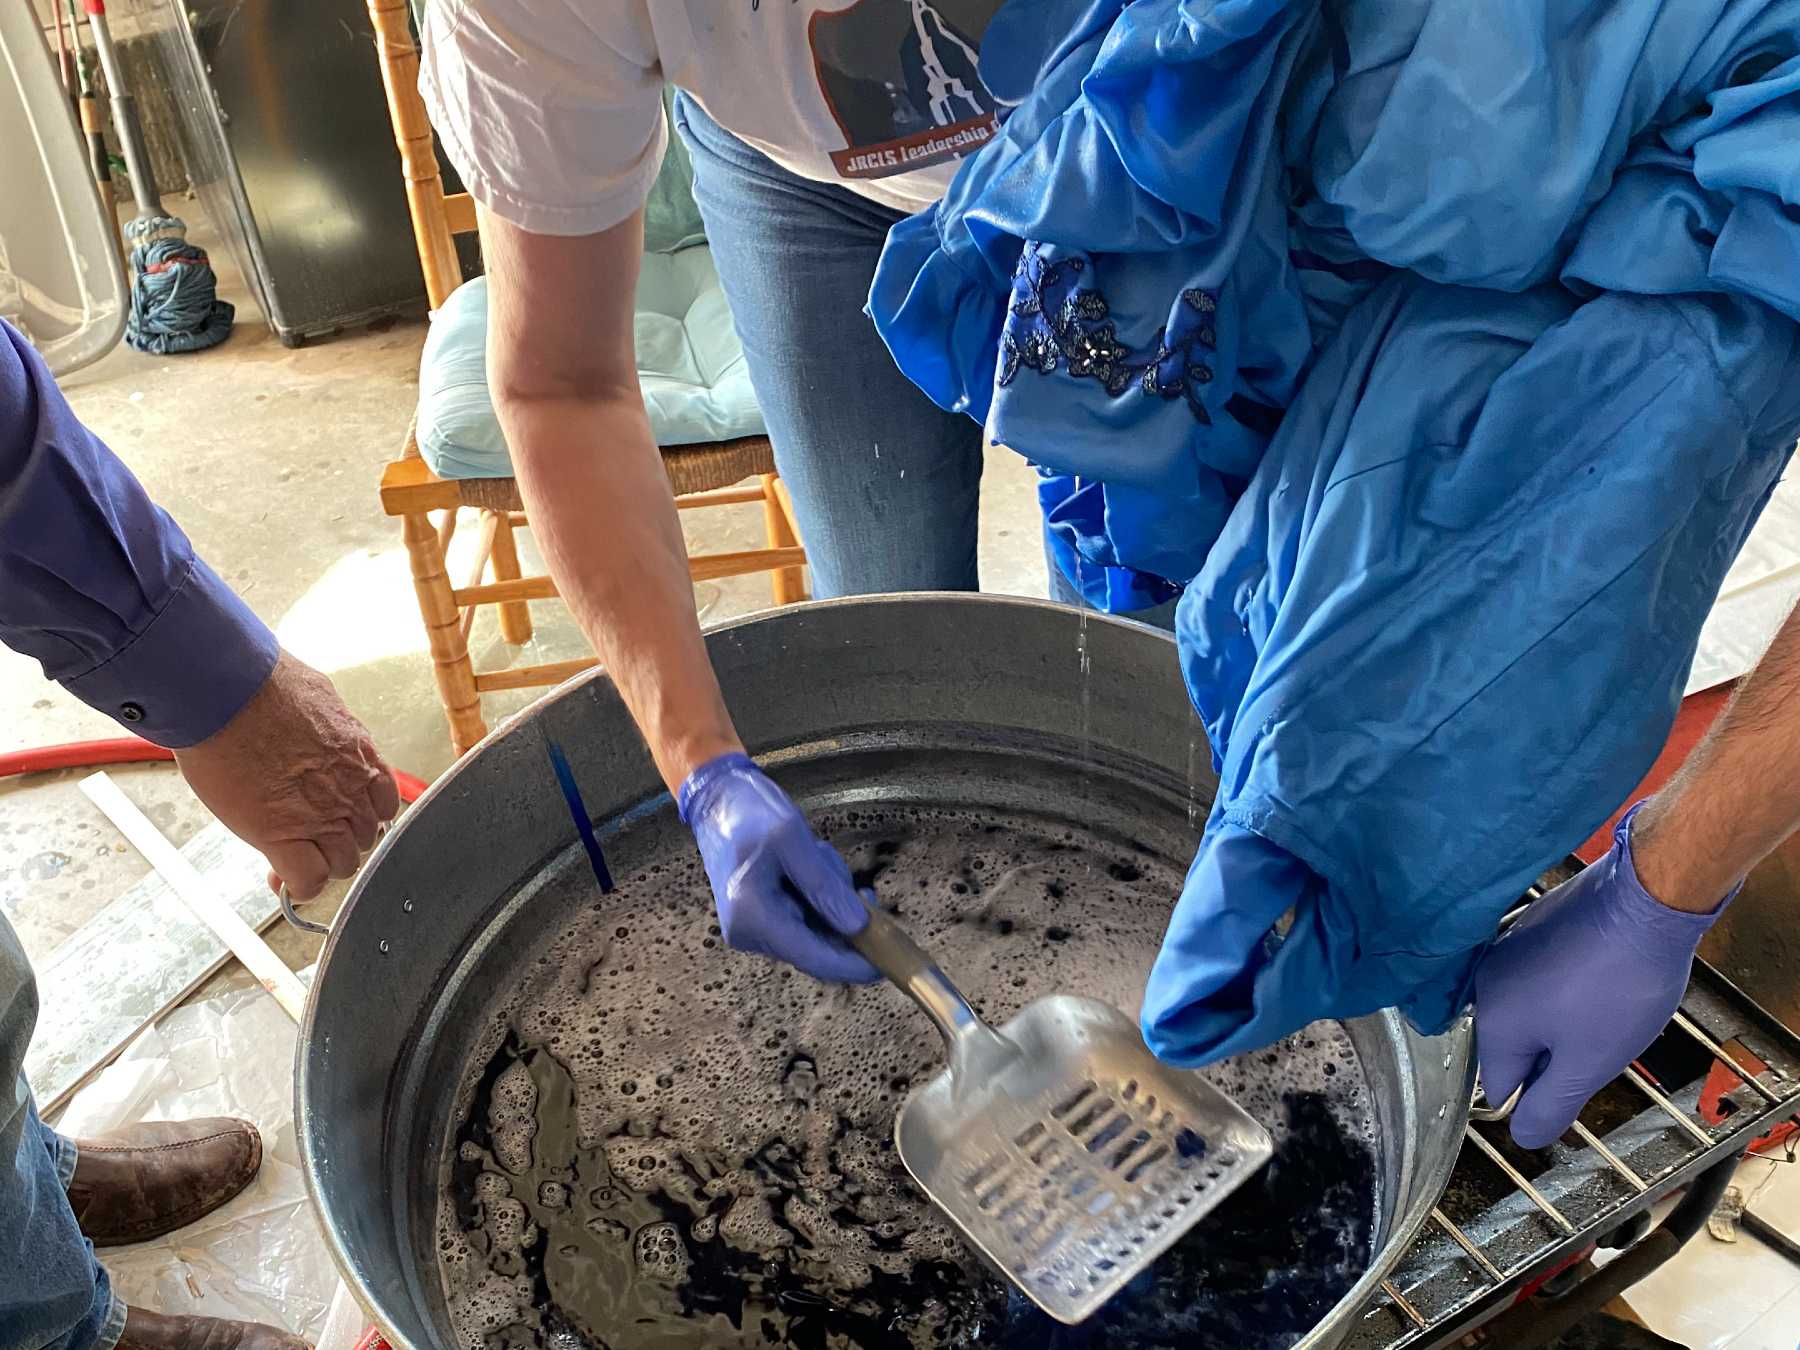
Since our dress was so big, we had to use a large metal tub to hold our dye. To keep it at the right temperature (and to protect the house from dye marks), we set up a propane camp stove in the garage and used a cooking thermometer to measure the water temperature.
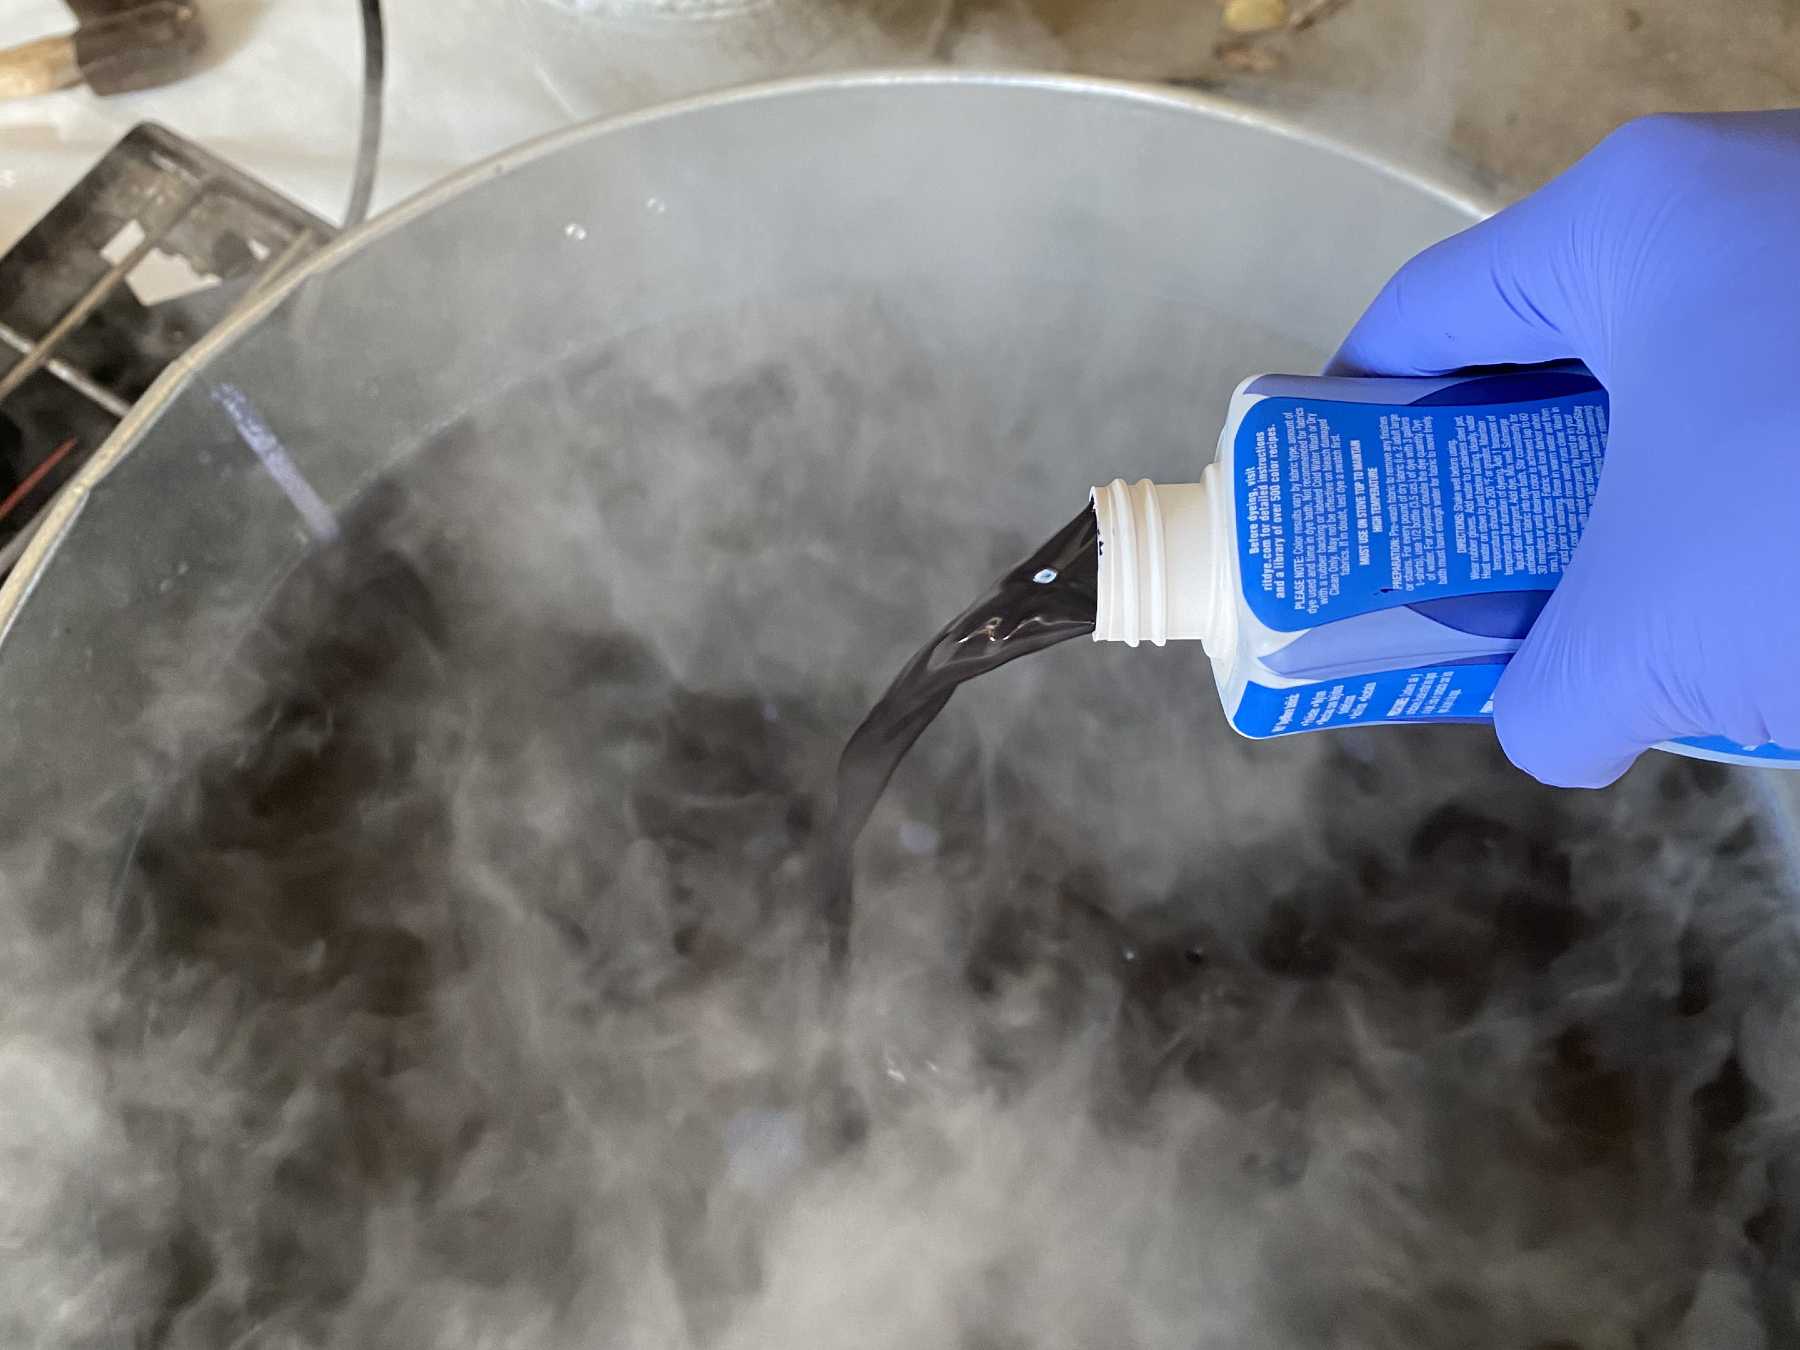
Next we added our dye. The brand we used also instructed us to add a bit of dish soap to the water.
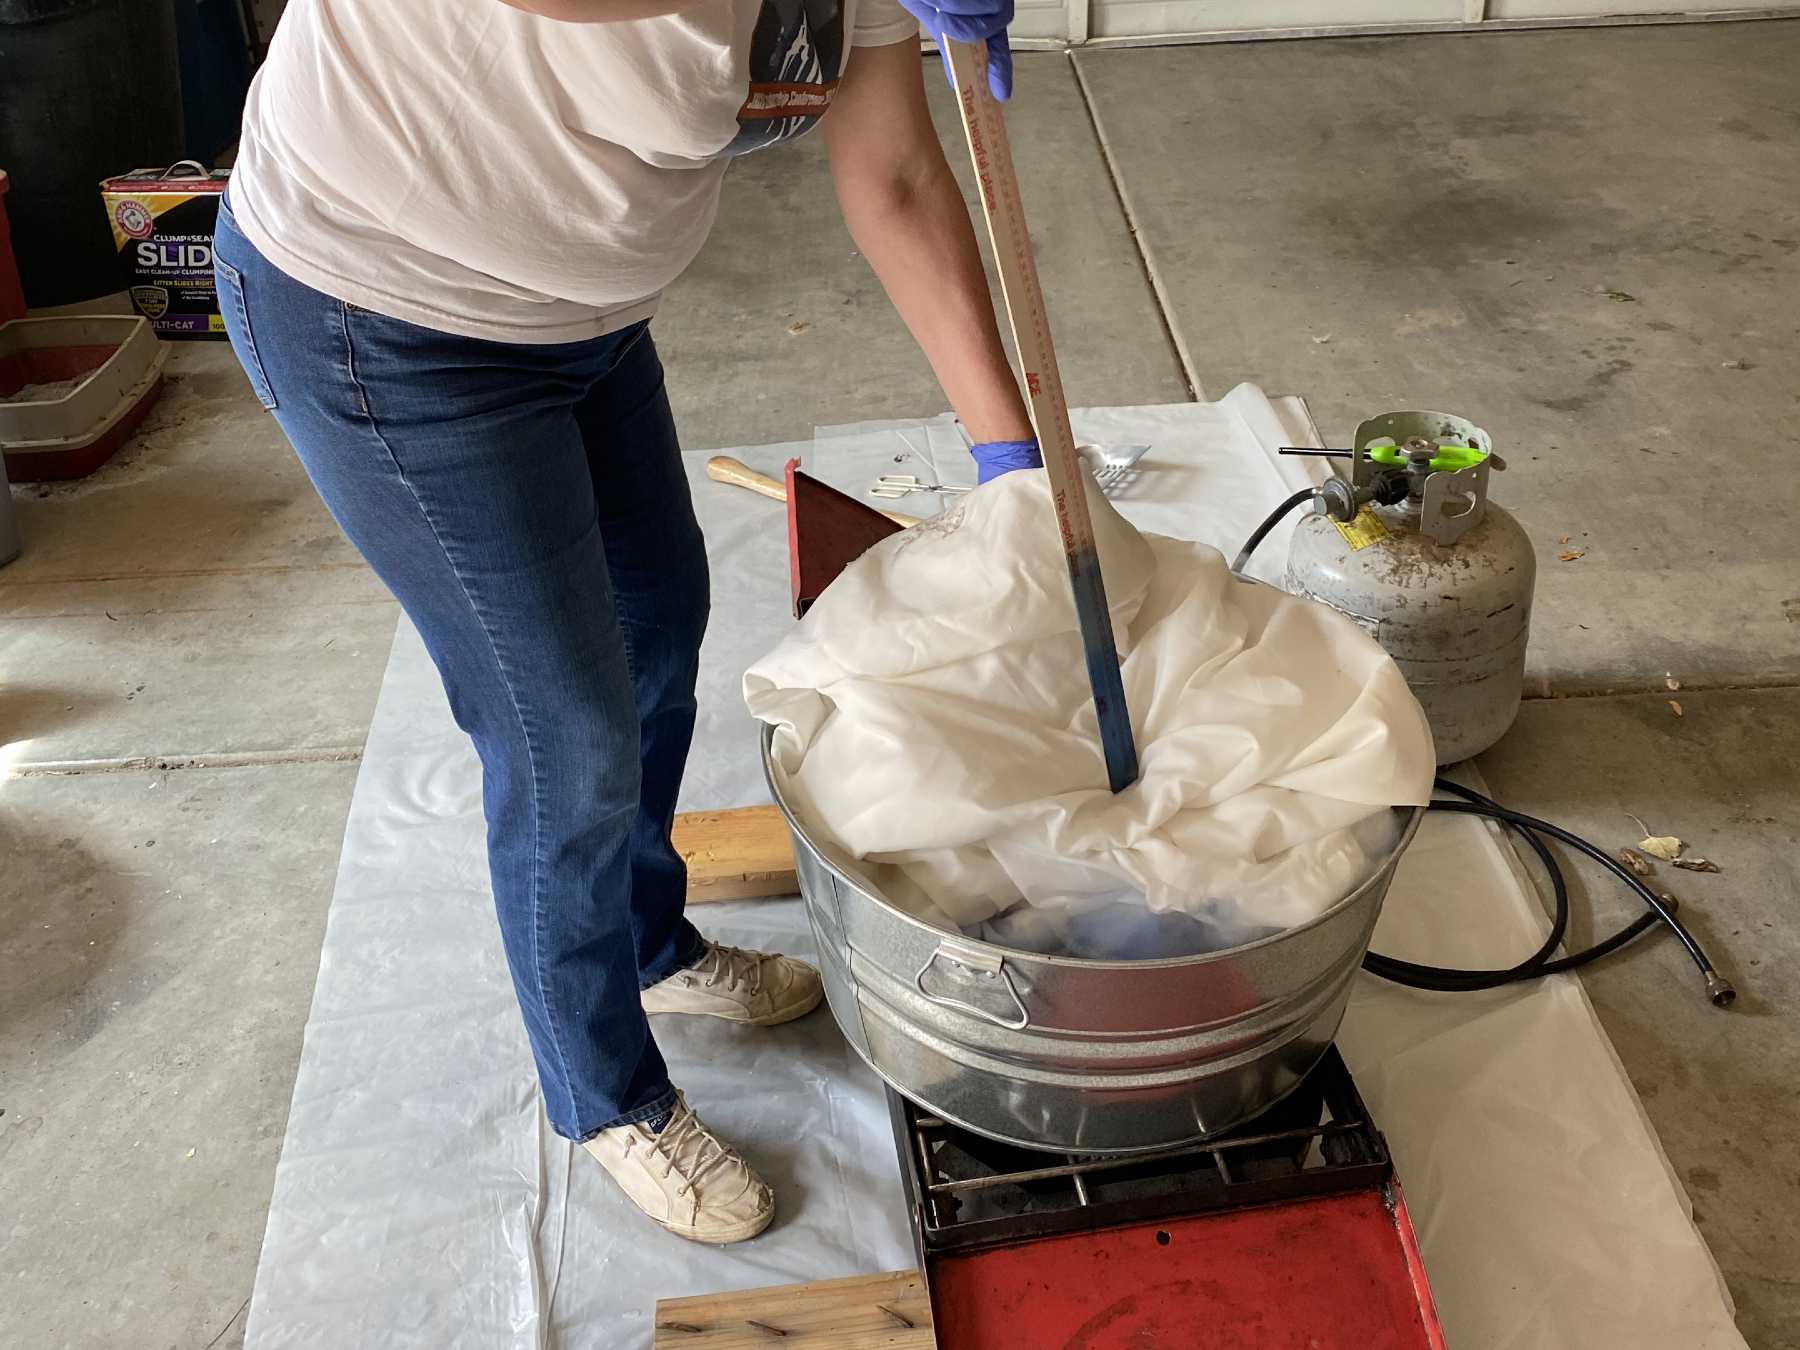
Once the water was heated and the dye and soap had been mixed in, we began to dip the dress. You can use any large stick to push the fabric under the water (we used a yard stick).
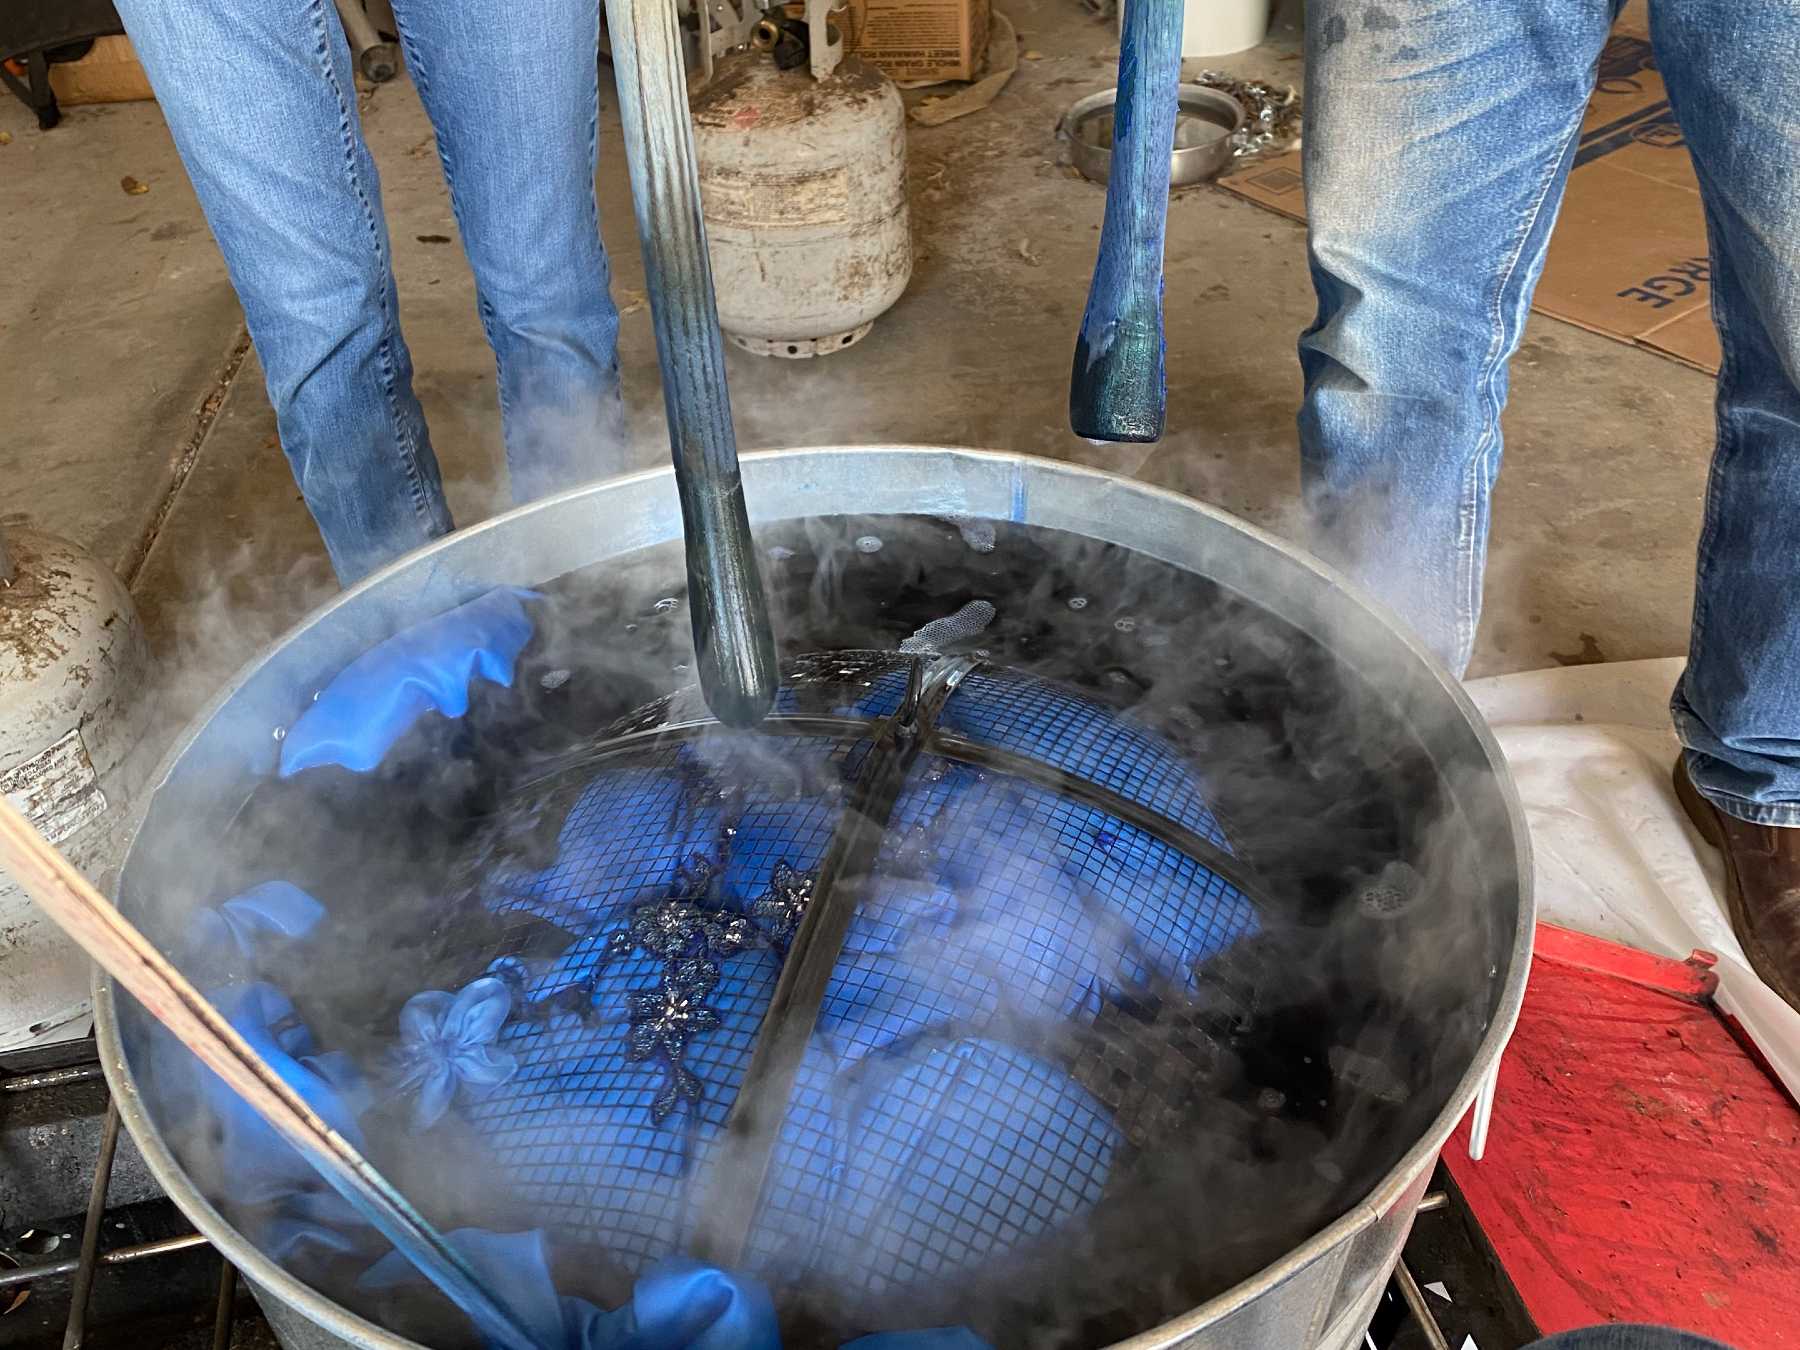
Naturally, the dress wanted to rise to the top of the water. So, to keep it submerged and ensure an even color, we also used a cover from an outdoor fire pit to push the dress down as it rose. Your instructions should specify how long to keep the dress submerged (though you may need to modify those instructions based on the results of your dye test).
6. Wash and Dry
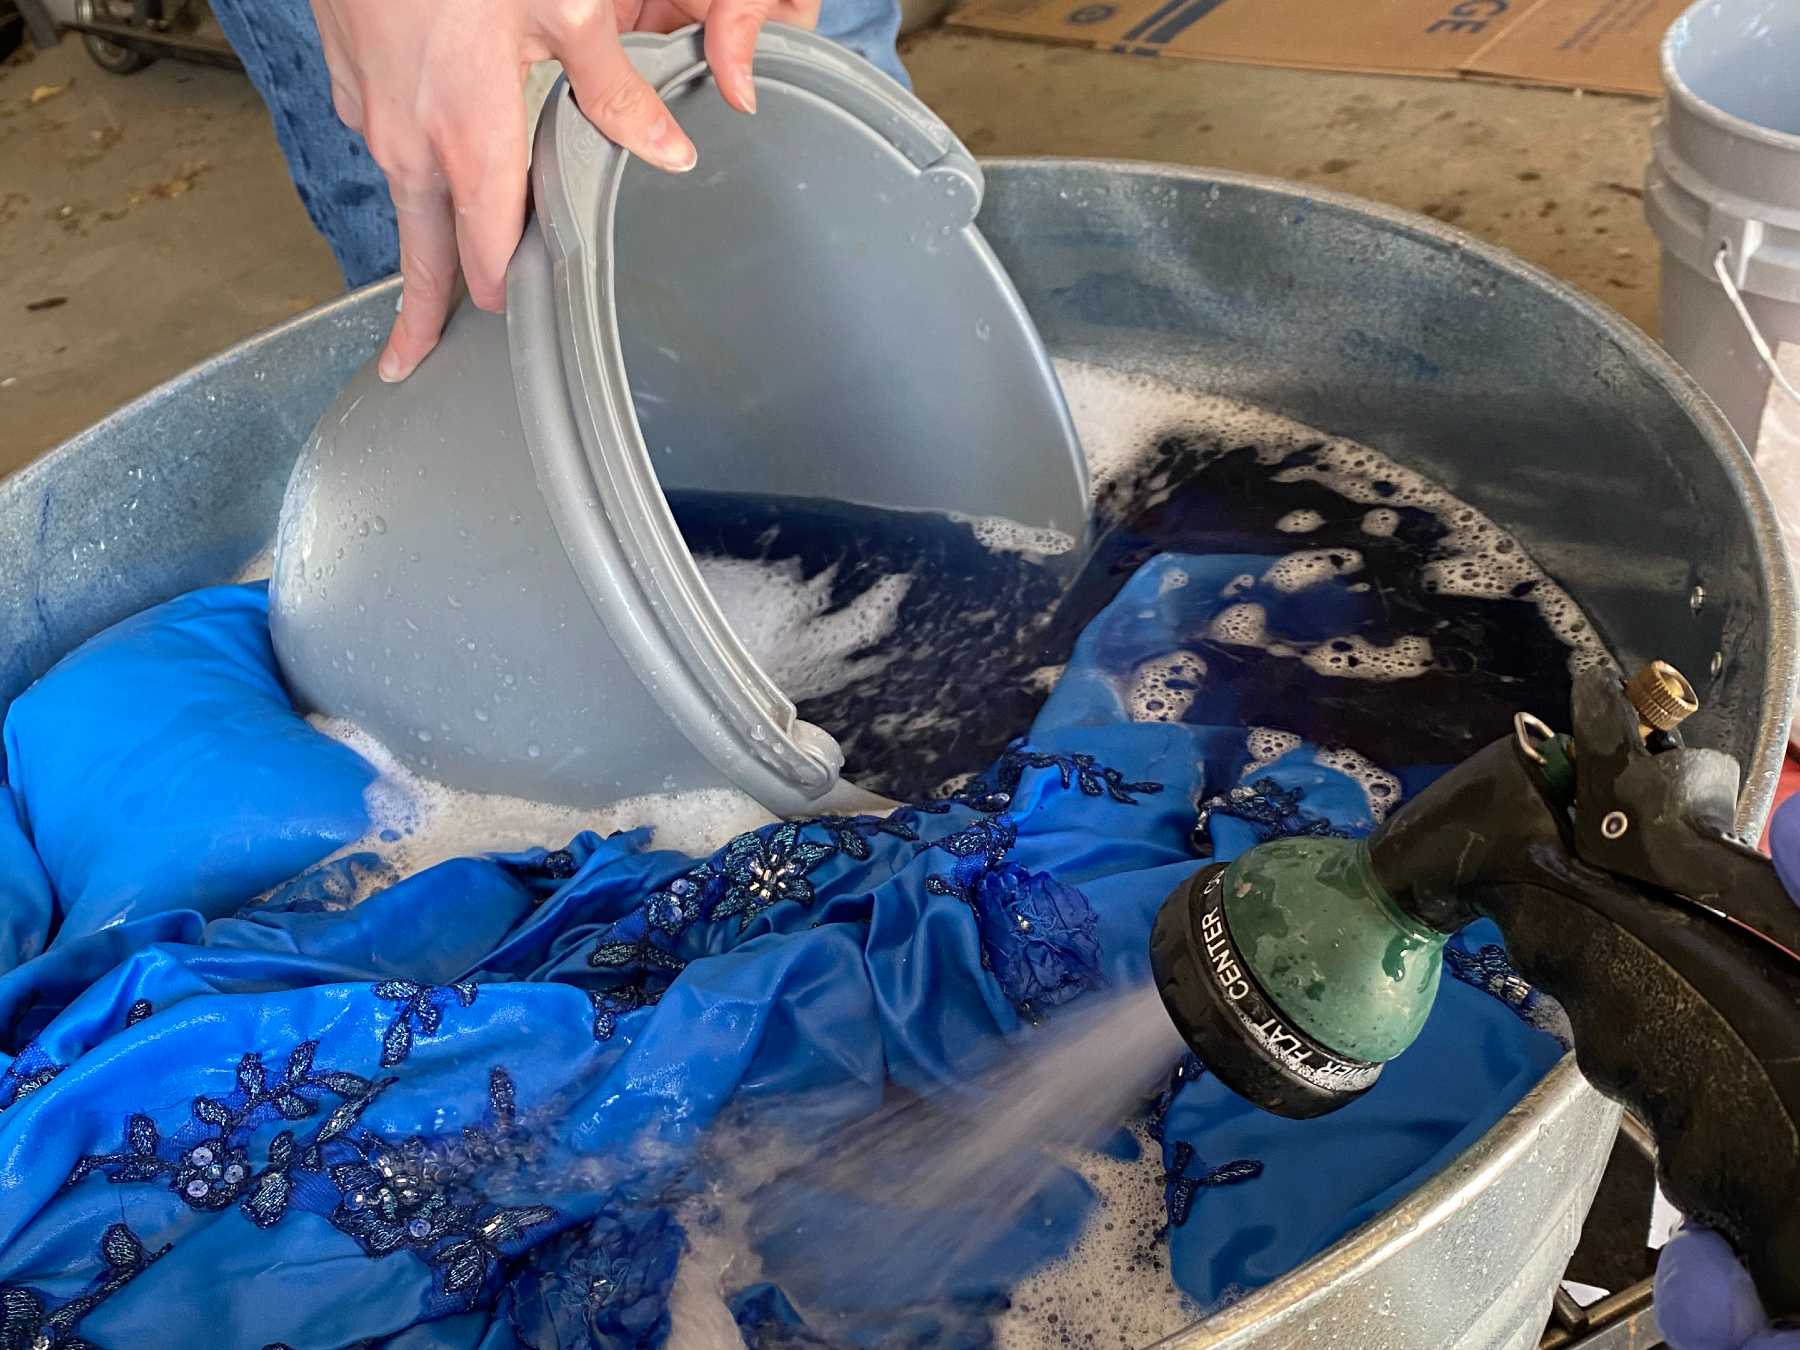
The next step is to rinse the dye from your dress. While you can do this in your kitchen sink or bathtub, we opted to use a hose (since we were in the garage). We used a bucket to remove the dye water gradually while spraying a hose into the tub to rinse.
Next, we removed the dress from the tub and wrung out the dye. We hung the dress over the tub and continued to use the hose on it until the water ran clear.
During this process, we discovered that a number of the fabric rosettes from the dress had fallen off in the tub. We scooped these out to use as hair decorations.
Finally, we ran the dress through the wash one more time with mild detergent (depending on your dye, this step may be optional). Then we hung the dress to dry completely.
7. Prep
Once the dress was rinsed, washed, and dried, we began final prep work. First, we assessed the dress for any problems with the dye job. This is an important step to make sure that the dress took the color evenly. If you notice any lighter or darker areas on your dress, you may want to consider returning the dress to another dye bath to even out the color.
In our case, the color was fairly even on the main part of the dress. There were a couple of plastic embellishments that had melted in the hot water and caused some discoloration, but it was minor enough that we felt it could be overlooked. The lace and other appliqués did take the color more darkly than the rest of the dress, but that was the look we had hoped for.
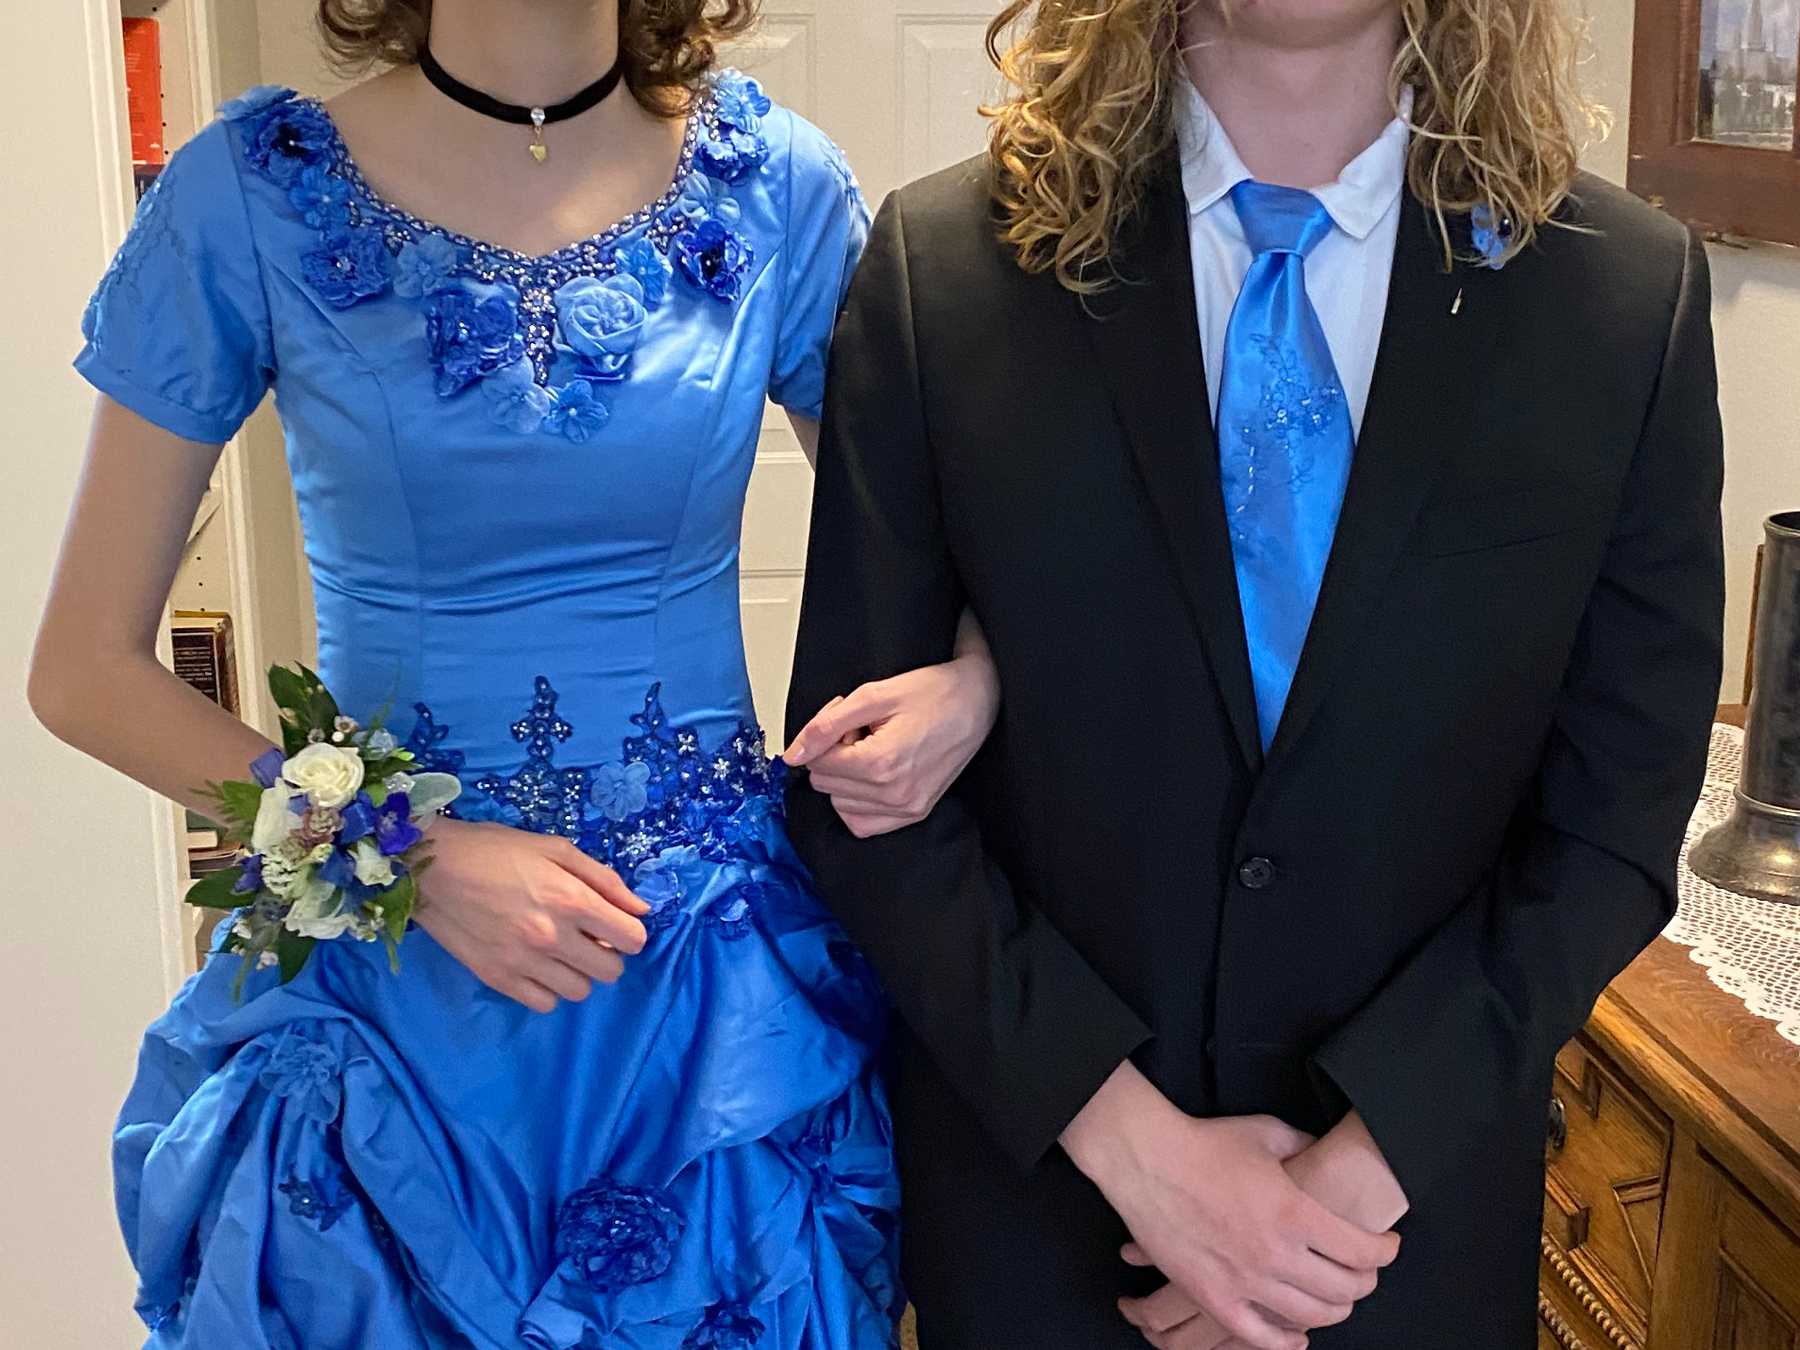
Our final prep work involved reattaching a few of the embellishments that had fallen off, then ironing and steaming the dress. We also used our dye test fabric (from the underskirt we’d removed) to make a tie for our prom-goer’s date.
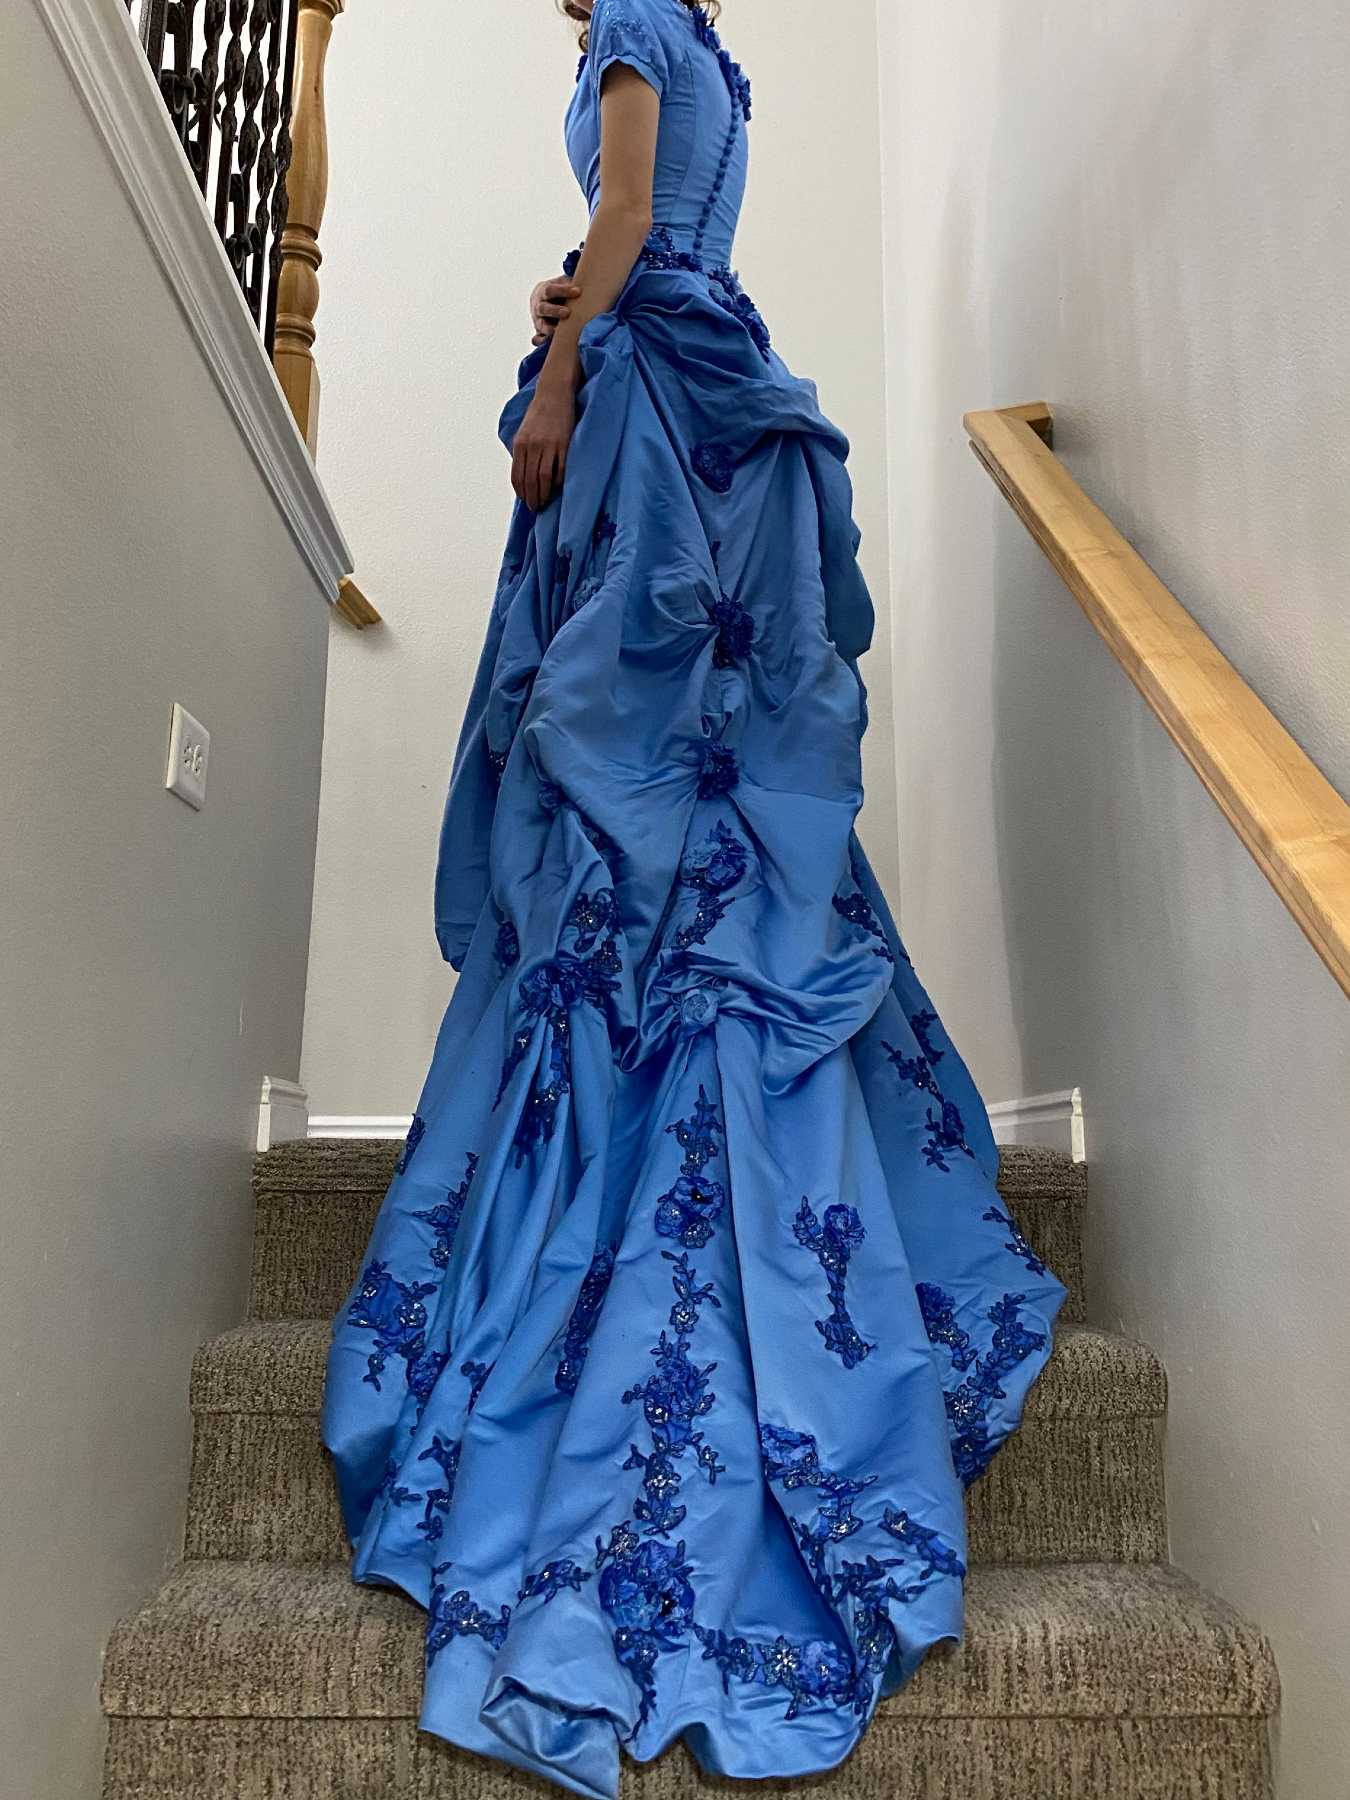
As you can see, the result was fantastic. The advantage of making over a wedding dress was that the dress had all kinds of stunning details you wouldn’t normally find on a prom dress—that train, for example! Our prom-goer wound up with a one-of-a-kind dress, and even with the cost of the dye, the tub, and other supplies, we wound up paying far less than we would have if we’d bought a brand new dress.
What do you think of this project? If you give it a shot, be sure to tag us @deseret_industries on Instagram and @deseretindustriesthrift on Facebook. We can’t wait to see what you create!
Recent Posts

How Thrifting at DI Makes Wedding Season Affordable
From bridal showers to receptions, a little creativity and strategic thrifting at Deseret Industries can make a wedding event more affordable and meaningful.

Analise Finds Purpose Through Learning and Service at Deseret Industries
See how Deseret Industries’ job training and supportive environment helped Analise build skills, confidence, and a renewed sense of direction.
Vacation-Ready on a Budget: How to Thrift Great Travel Outfits
Find affordable vacation outfits at Deseret Industries. Discover thrifted casual wear, formal looks, hats, and shoes for your next trip.

Harrisville Deseret Industries Reopens with a Fresh Look and Expanded Offerings
The Harrisville DI store has been remodeled, featuring an improved layout, new items, and a renewed focus on job training.