
How to Make a Removable Collar for Cute, Quick Layering
Have you ever drooled over those photos on Pinterest—you know, the ones of girls wearing cozy sweaters with a cute Peter Pan collar underneath, holding a cup of cocoa or a book? So whimsical! But have you ever actually tried layering a collared shirt under a sweater? It’s hot, it’s bulky, and you could never wear that same cute collar with, say, a dress or your favorite graphic T-shirt.
Enter removable collars!
A removable collar (also known as a dickey collar, false collar, loose collar, or mock shirt) is a sort of versatile bib that can be worn under anything you like! Removable collars are the best way to achieve a cozy, layered look without the fuss of wearing actual layers. Not to mention, collars are a great way to give new life to your existing wardrobe.
You can make upcycled collars from gently used button-down shirts, blouses, or vintage dresses thrifted from Deseret Industries.
Here’s how!
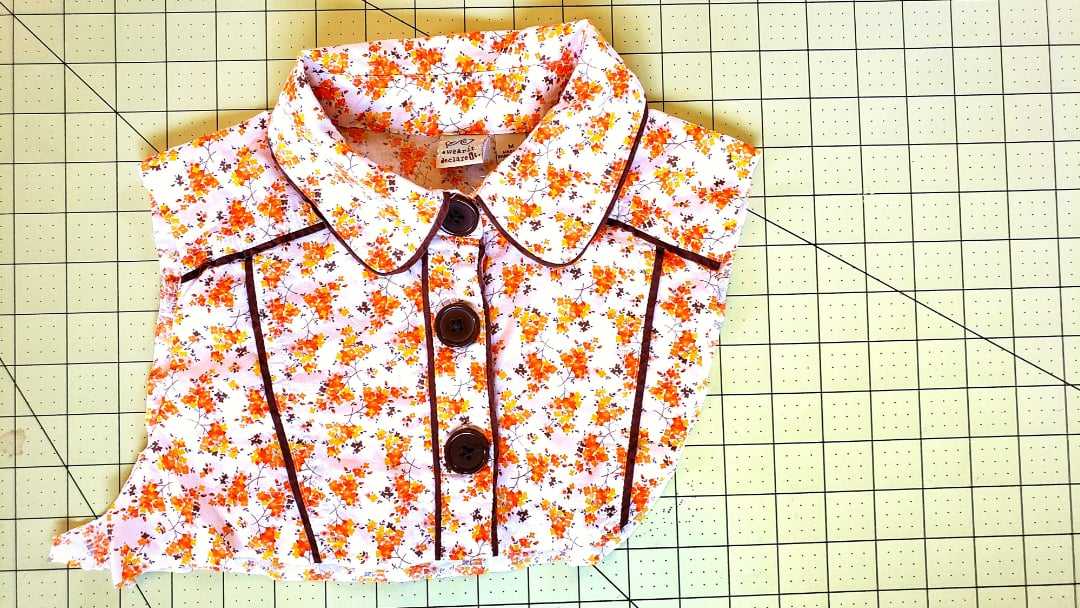
STEP 1—Thrift a collared clothing item.
As you comb through the racks at DI, keep an eye out for pleasing textures and colors. A white lace Peter Pan collar will add vintage charm to anything you pair it with, whereas novelty prints bring a much-needed pop of color to a mundane outfit. If you stumble upon a Peter Pan collar with floral embroidery, try to contain your squeals! You can always happy dance in the parking lot afterward!
When shopping for a collar to upcycle, you hardly ever need to go to the dressing room to try on your finds. (Yay! No juggling fussy kiddos in a small space!) As long as your neck measurement fits within the neckband, you’re good to go! This means that a collar from a plus-size, petite, or any other size blouse can fit a wide range of people because you don’t have to worry about the bodice fitting.
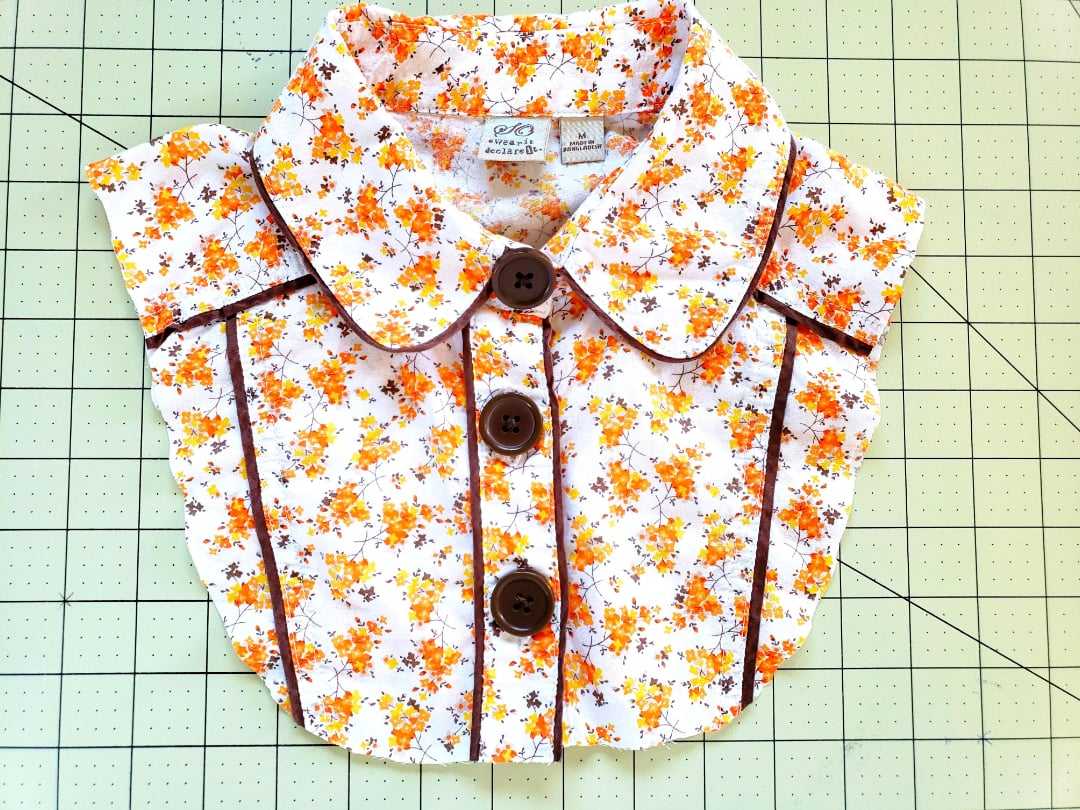
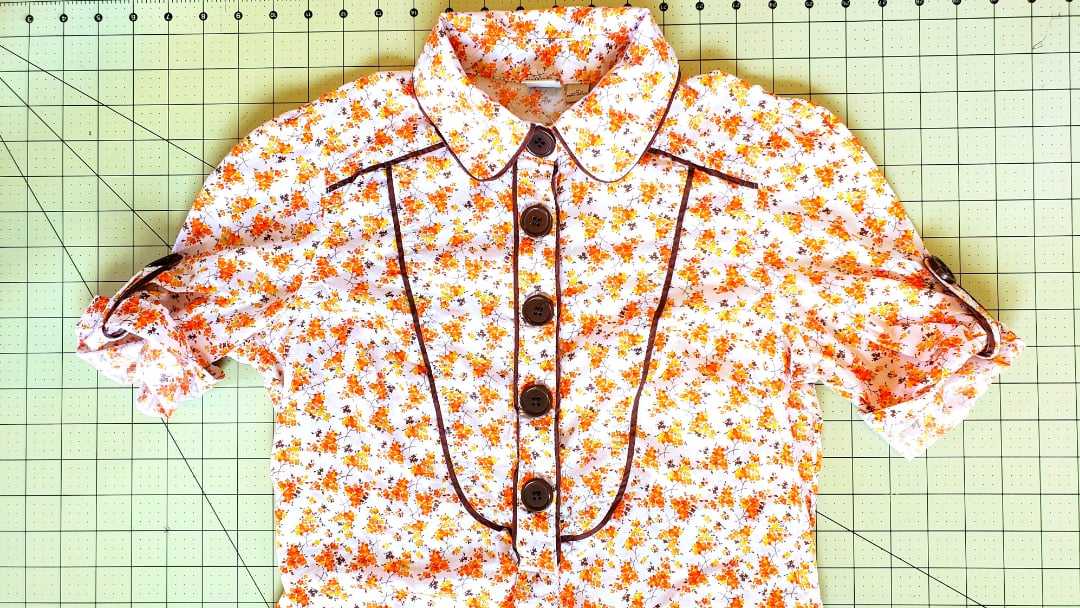
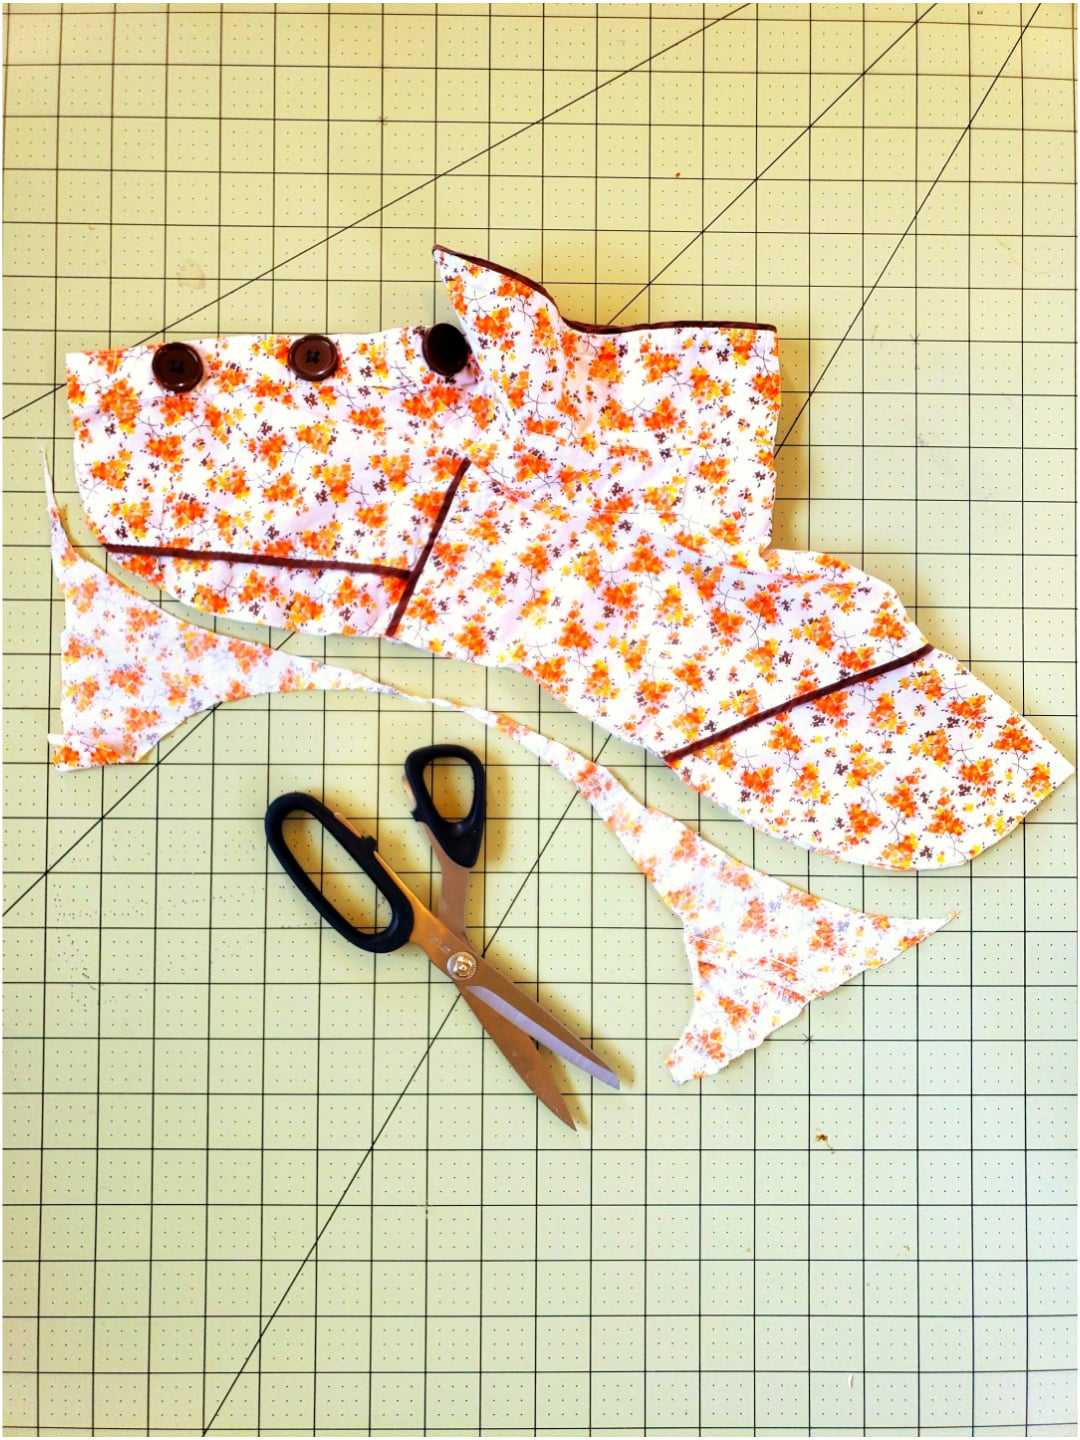
STEP 2—Cut off the excess fabric.
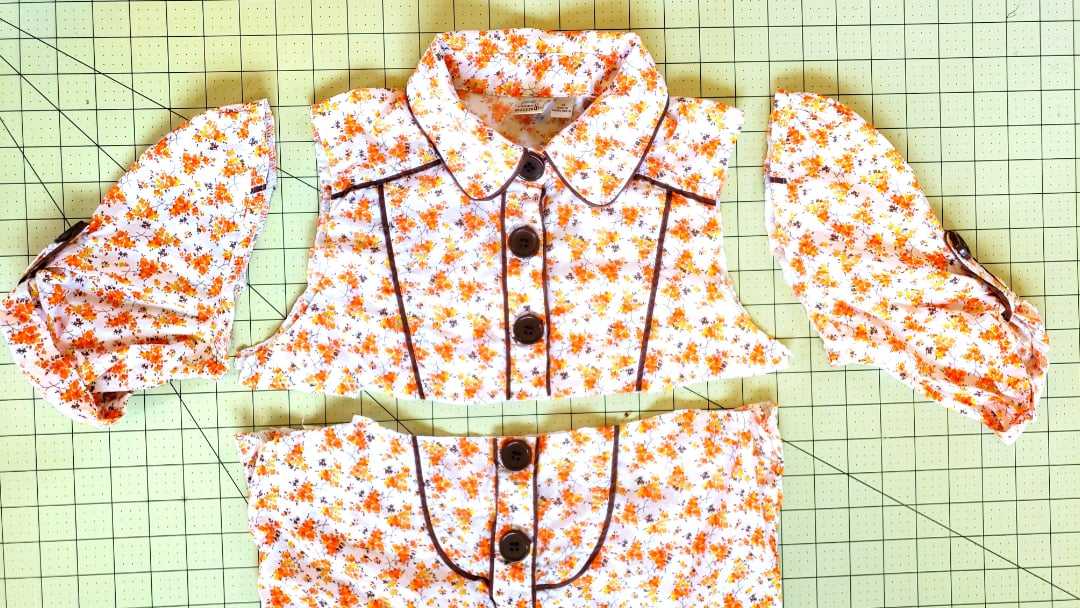
There’s no finesse needed in this step. Just cut off half the bodice and both sleeves, but be mindful not to cut off too much of the shoulder.
STEP 3—Shape your bib.
Cut your bib into a U shape. Focus on one side at a time. Cut one side of the front, then one side of the back.
Fold the whole bib in half lengthwise. Line up button holes and collar edges, and pin into place. Use the halves you cut and shaped as a template for the other side.
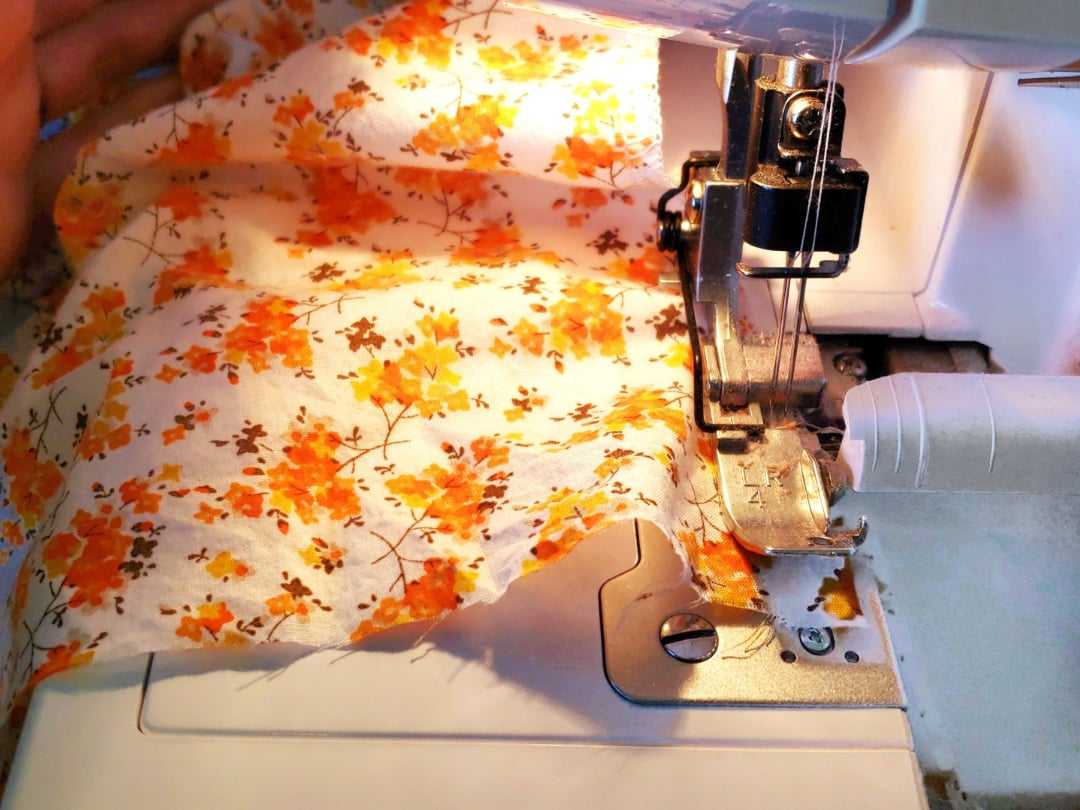
STEP 4—Stitch it up!
Use your favorite hemming method to seal up those raw edges. You can use a serger, bias binding tape, or a zigzag stitch on a regular sewing machine.
STEP 5—Live COLLARfully!
Have fun rocking that collar year-round under anything and everything! You’ll be surprised at what a cute Peter Pan collar can do for a regular black T-shirt or at the sophistication a pointed collar can add to your daily sweaters.

Don’t forget to save your leftover fabric to upcycle in other ways! Some of our favorites are using them for doll clothes, bags, costumes, quilts, and other art projects.
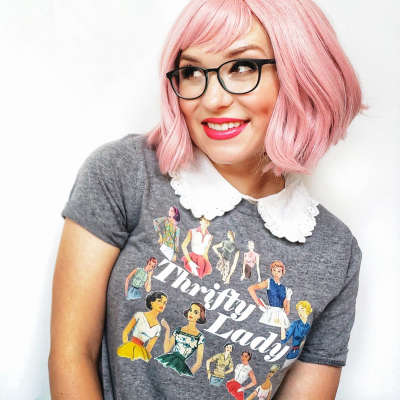
Magnus is a novelty collar designer hailing from Tooele, Utah, where she lives with her husband and three kiddies! Her favorite pastime is dreaming up new ways to incorporate color, humor, emotion, and charm into her detachable Peter Pan collar collections that she sells online. Visit her website or follow her on Instagram to see more of her cute collars, T-shirts, and accessories and for daily collar-styling tips and a behind-the-scenes look at her brand.
Recent Posts

Finding Fulfillment in Helping Others Grow Their Skills at Deseret Industries
For Jori, the DI job training program has played an important role in her story of growth, leadership, and helping others gain skills and confidence.

How Deseret Industries Helped One Associate Build a New Life
For Mila, working at Deseret Industries has provided flexibility to navigate life while also preparing her for future employment opportunities.

What Deseret Industries Tags Mean—and How to Use Them
From price tags and color rotation to sold tags on furniture, lear what tags at Deseret Industries mean so you can shop smarter at DI.
Building Skills and Confidence at Deseret Industries
Follow Miles’s journey as a Deseret Industries associate as he builds skills and confidence through the Deseret Industries job training program.